As a follow up to my last post, here is a video for my lovely Youtube followers! As always the actual blog post is more detailed, click here to visit.
My channel: http://www.youtube.com/user/loodieloodieloodie
Friday, July 29, 2011
Tuesday, July 26, 2011
Moisturize Your Nails with Acetone ... kinda
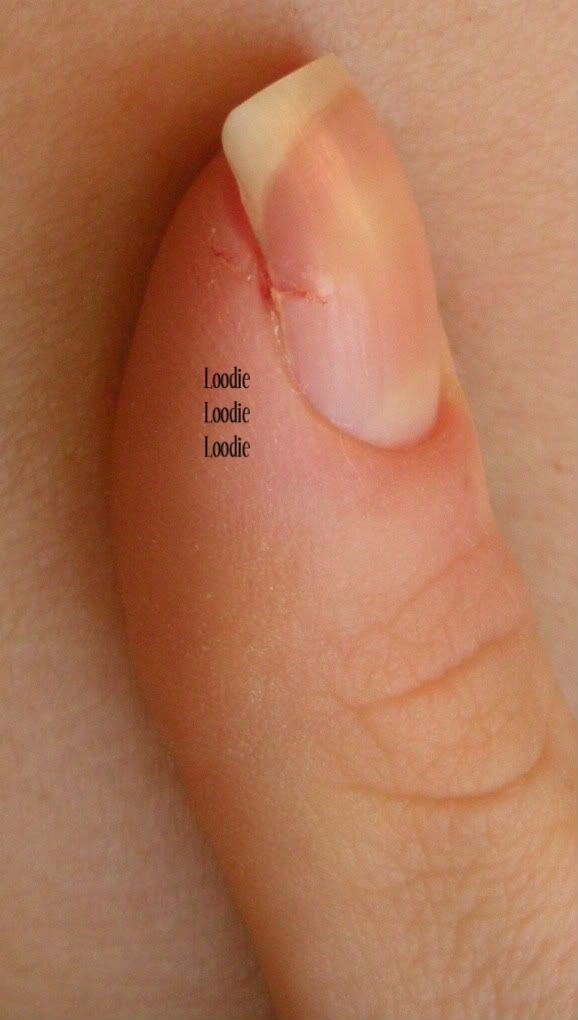
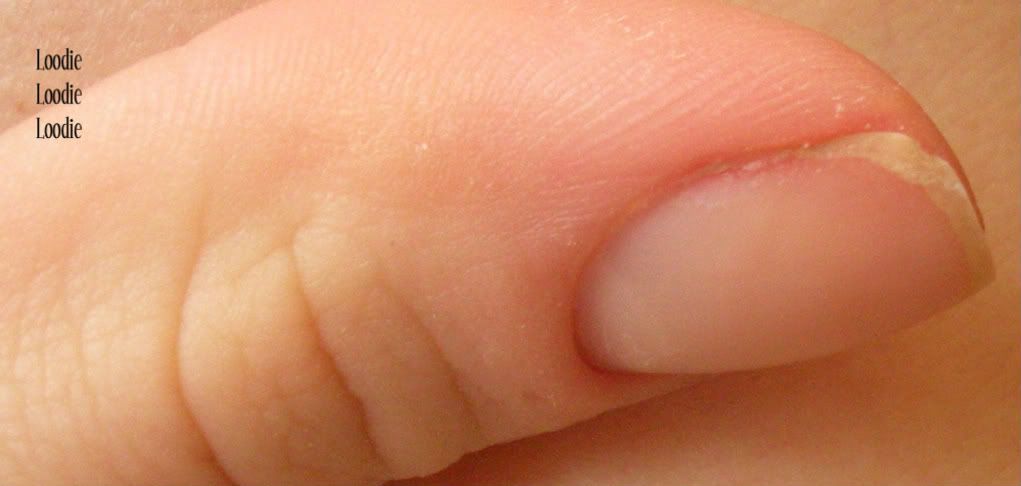
One of the most effective solvents for nail polish removal is ACETONE. I have previously described acetones’ positive attributes (regarding efficiency and safety) in this post. However, if you change your nail polish often or soak off polish, acetone can eventually dry out skin. Umm can we just look at this picture … redonk!
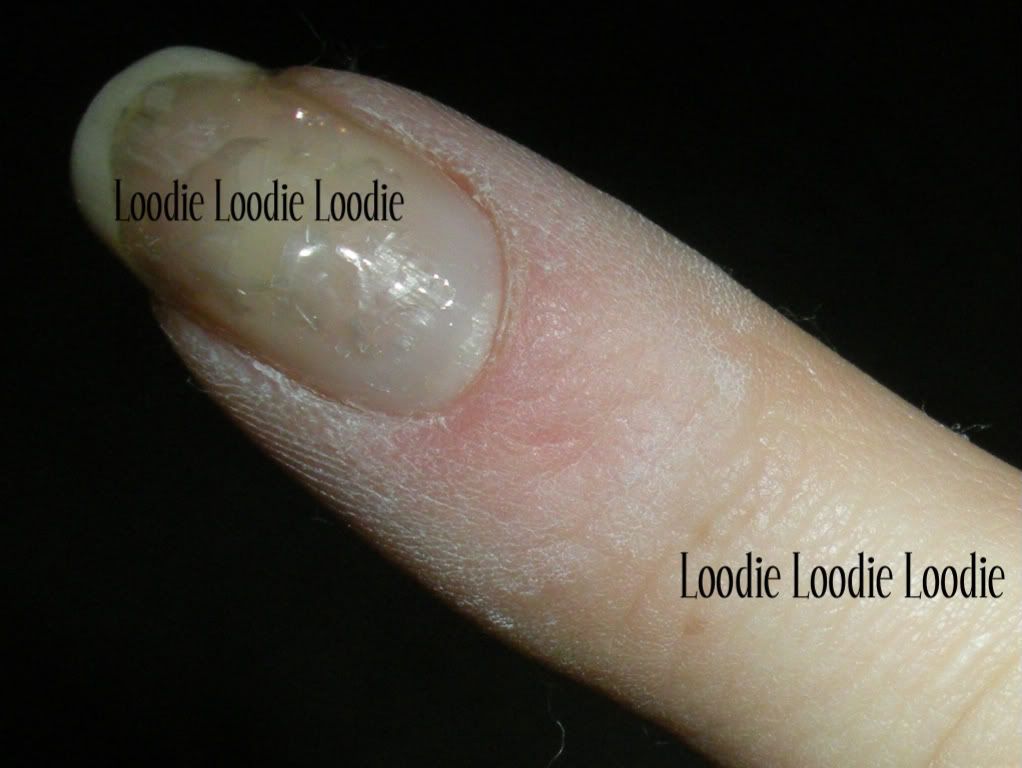
This is a picture from the Nail Fix Series. I use Shellac (or other gel nail polishes) for nail breaks and after removal my hands look like they have been mummified, lol.
So what are some options for us? How about a moisturizing nail polish remover?
Everyone LOVES Zoya Remove +, am I right? In particular Rachel Marie ;) I will have to agree with the fact that it is a great remover. Not only is it effective, but it is very moisturizing and great for the nails and cuticles. However, the smell and price seriously disturb me. For non-licensed people, Zoya Remove is $10 per 8oz ($25 per 32 oz.). Let’s take a look at the ingredient list:
Zoya Remove + ingredients are:
2-propanone, water, glycerin, fragrance, violet 2
In layman’s terms, the Zoya Remove + ingredients are:
Acetone, water (surprised they didn’t use aqua or something fancier lol), glycerin, stink, unnecessary dye.
Considering I buy acetone for $5 per 32 oz. at the local nail supply store this is crazy!! F U unnecessarily expensive products! Guess what? We can make our own moisturizing remover for way cheaper! :D
There is a lot of talk on the MUA nail boards on this topic, so you may already know that the basic recipe for moisturizing polish remover is … Acetone + Glycerin, however I have something science-y to add to this recipe with lots of pictures!
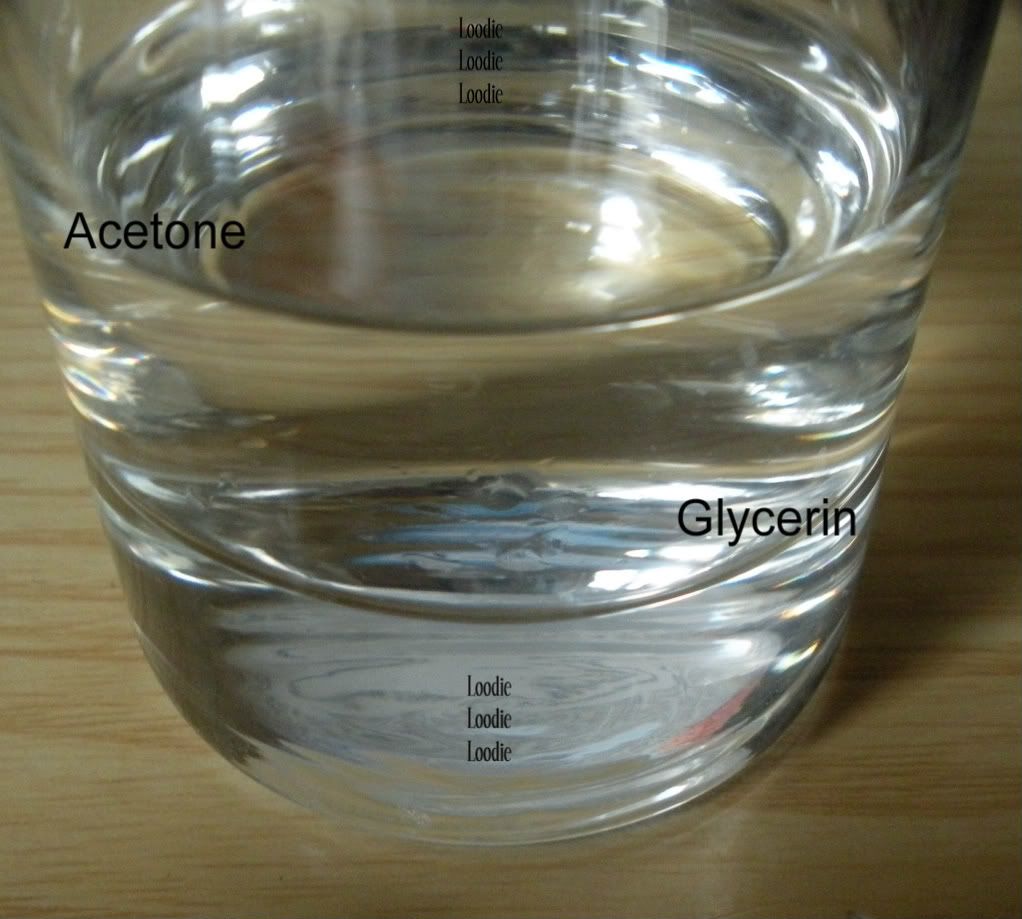
An inherent physical property of Glycerin is that it is ONLY PARTIALLY soluble in acetone. This is why the recipe often quoted on the nail boards is accurate and will work, BUT there is a slight problem. If you put an excess of glycerin in acetone at some point they will NOT (and simply CANNOT) mix any further. If anything you will see two separate solutions, similar to oil and water (or another visual ... yummy salad dressing - oil and vinegar :D) … here is an actual picture of glycerin in acetone.

As a side note: Glycerin is more dense than Acetone so it sinks to the bottom. Haha, I just tricked you into learning something, yay!
Now, if you have the right proportions you can get them to mix completely.

I tried to mix it well, but darn it I added too much glycerin from the start for it to mix in a miscible manner.
So how do we fix this problem? With science of course! :)

Another inherent physical property of Glycerin is that it is completely miscible in water! It will mix in any proportions of water and never separate. Furthermore, Acetone is miscible in water. So the beautiful thing is that we can jam more glycerin in acetone by adding a small bit of water! Water helps to keep the glycerin that can no longer mix with acetone in solution.
Add a splash of water and mix well!
As you begin to mix, the solution will initially be hazy.
COOL DUDE!
Want to see a video of this? click here

Here is the resulting solution after adding water to a solution containing excess glycerin in acetone and thoroughly mixing.
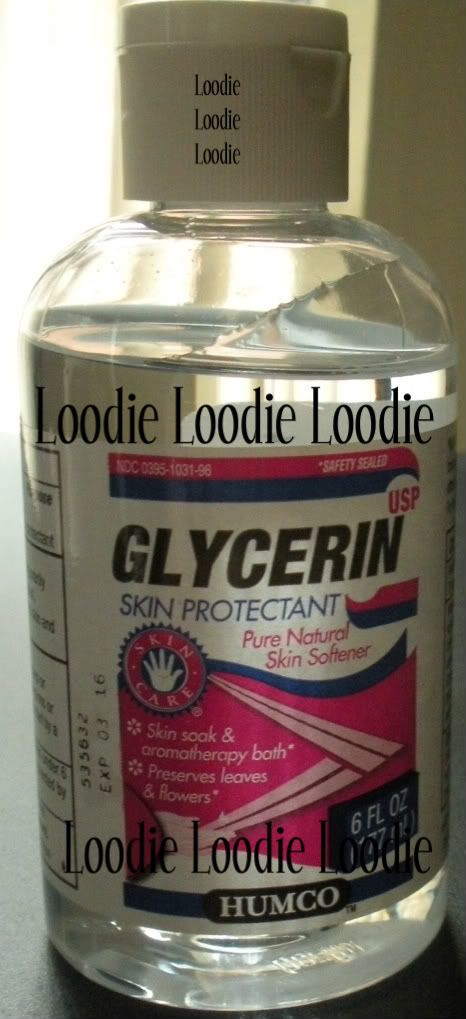
You can find glycerin in your local pharmacy. I had problems, my eyeballs kept glazing right past it, but the pharmacist helped me find it immediately.
This one was about $7 per 6oz.
The recipe:
As a guideline only, I would say 1-2 tablespoons of glycerin per 200mL of acetone.
Then add small splashes of water until the solution is mixed completely.
However, you can play around with different amounts glycerin and adjust to your personal preference. You should adjust the water amounts to your glycerin levels of choice. Only add as much water as necessary to incorporate the glycerin because it weakens the effectiveness of the acetone.
Caution:
Although I showed you the process in a glass, that was just so that you could see the different layers. You should do your mixing in the acetone bottle. It's much easier and safer to mix with a cap on. Watch your eyes and try not to get acetone in them, because I almost did. After you mix it well in the bottle, you might want to loosen the cap to release any built up pressure, then close it back up for storage purposes.
Another thought:
In my initial post about acetone, I mentioned that glycerin may interfere with polish adhesion. From personal experience, I can't say this is necessarily true, at least not as true as it is for oils and waxes. So, I kinda retract this statement, but would love your opinion or experience on the topic!
Short Video Version
Short Video Version
Sunday, July 24, 2011
Hello New Loodie!
Hello New People!
If you're new to my blog you may have missed a few interesting posts. I thought I would summarize a few interesting series and/or topics:
Nail Filing Series:
X-Files Post and Video
Nail Shape and Balance Post
Taking Down Nail Length Post
Shaping the Free Edge - Square Post and Video
Shaping the Free Edge - Oval Post and Video
Shaping the Free Edge - Squoval Post and Video
Sealing the Nail Plate
Buffing out a peel
Nail Hardener/Treatment Series:
Nail Hardener/Treatment Categories
Formaldehyde Nail Treatments
Are Formaldehyde Based Treatments right for you?
Protein Based Treatments
Formaldehyde + Protein Based Hardeners
Formaldehyde or Protein Based Hardeners + Moisturizers
Fluoride Based Nail Treatments Part I
Fluoride Based Nail Treatments Part II
Dimethyl Urea (DMU) based Hardeners
I have had so many new followers I thought I would say 'hey' and 'WELCOME'! *waves spastically* :D
Many thanks to the other nail ladies in the nail community for their love and support ... especially Polish Insomniac and Rebecca likes nails. <3
Many thanks to the other nail ladies in the nail community for their love and support ... especially Polish Insomniac and Rebecca likes nails. <3
If you're new to my blog you may have missed a few interesting posts. I thought I would summarize a few interesting series and/or topics:
Nail Filing Series:
X-Files Post and Video
Nail Shape and Balance Post
Taking Down Nail Length Post
Shaping the Free Edge - Square Post and Video
Shaping the Free Edge - Oval Post and Video
Shaping the Free Edge - Squoval Post and Video
Sealing the Nail Plate
Buffing out a peel
Nail Hardener/Treatment Series:
Nail Hardener/Treatment Categories
Formaldehyde Nail Treatments
Are Formaldehyde Based Treatments right for you?
Protein Based Treatments
Formaldehyde + Protein Based Hardeners
Formaldehyde or Protein Based Hardeners + Moisturizers
Fluoride Based Nail Treatments Part I
Fluoride Based Nail Treatments Part II
Dimethyl Urea (DMU) based Hardeners
Nail Conditioners, and more nail conditioner talk here
Formaldehyde vs. Formaldhehyde Resin
Cuticle Care:
Moisture
More Moisture
Cuticles - to cut or not to cut
How to use cuticle remover
Nail Fix Series:
Gel polish to the rescue!
General Nail Care Tips:
Rules to live by
Formaldehyde vs. Formaldhehyde Resin
Cuticle Care:
Moisture
More Moisture
Cuticles - to cut or not to cut
How to use cuticle remover
Nail Fix Series:
Gel polish to the rescue!
General Nail Care Tips:
Rules to live by
Wednesday, July 20, 2011
I feel slightly old today
Happy Birthday to me! I am very excited mainly because this weekend I will be shoving my face full of deliciousness. My sister makes some killer cinnamon buns and I am crossing my fingers she'll read this in time, hint hint ;)
The MUA nail boards have inspired my b-day mani!
Hello sparkly goodness!
I love it so much. :D
I have to give thanks to the hubby for actually picking the final manicure. Good job!
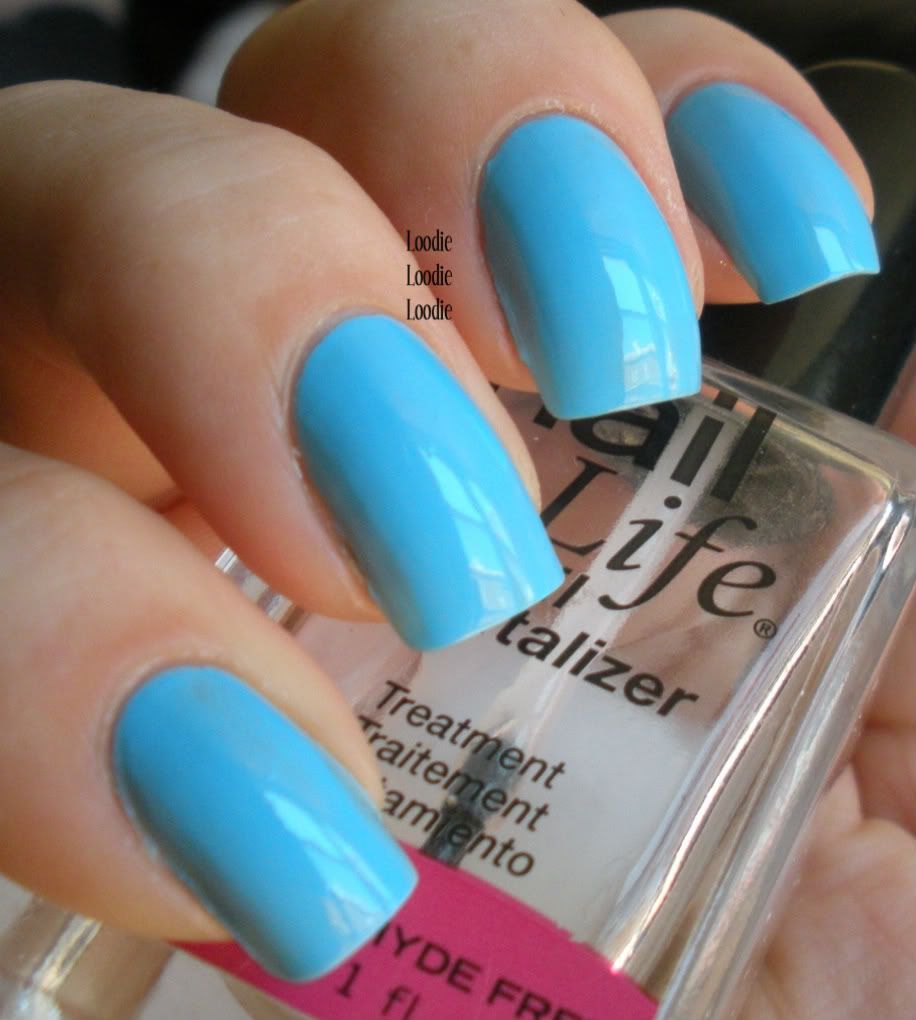
This is actually a layered manicure so here is what I used ...

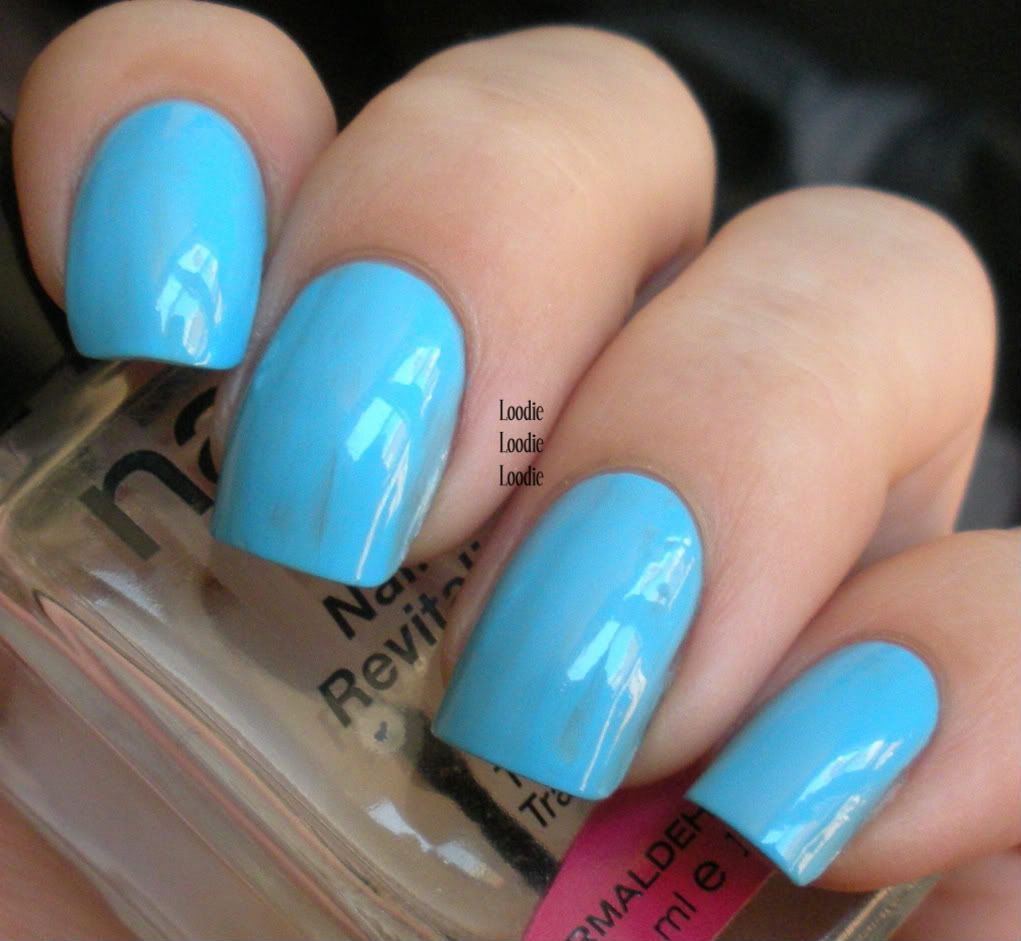
Base: Nail Life Nail Revitalizer
(formaldehyde free)
This is a protein based treatment with moisturizers, you can learn more in this post.
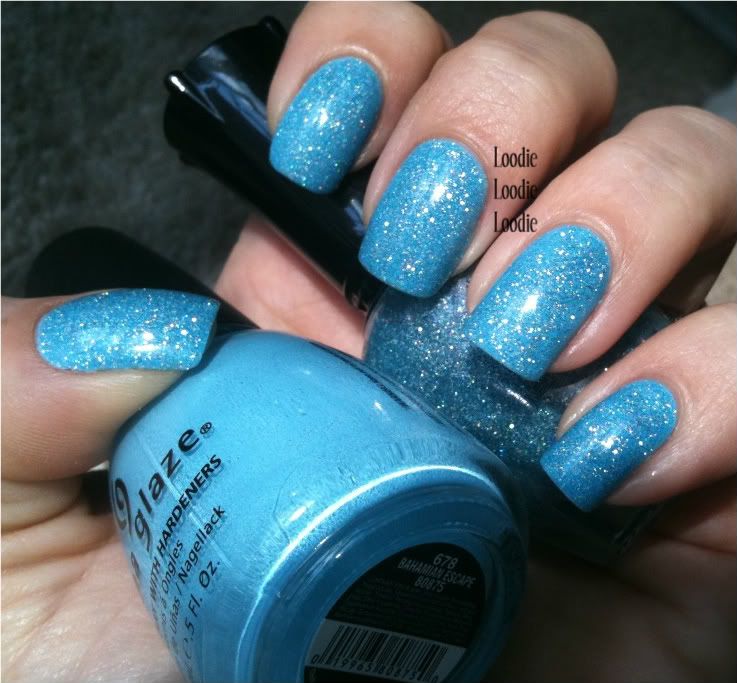
After the base, I applied one coat of the slightly streaky mess that is China Glaze - Bahamian Escape.

Somehow I managed less streaks with my non-dominate hand ...

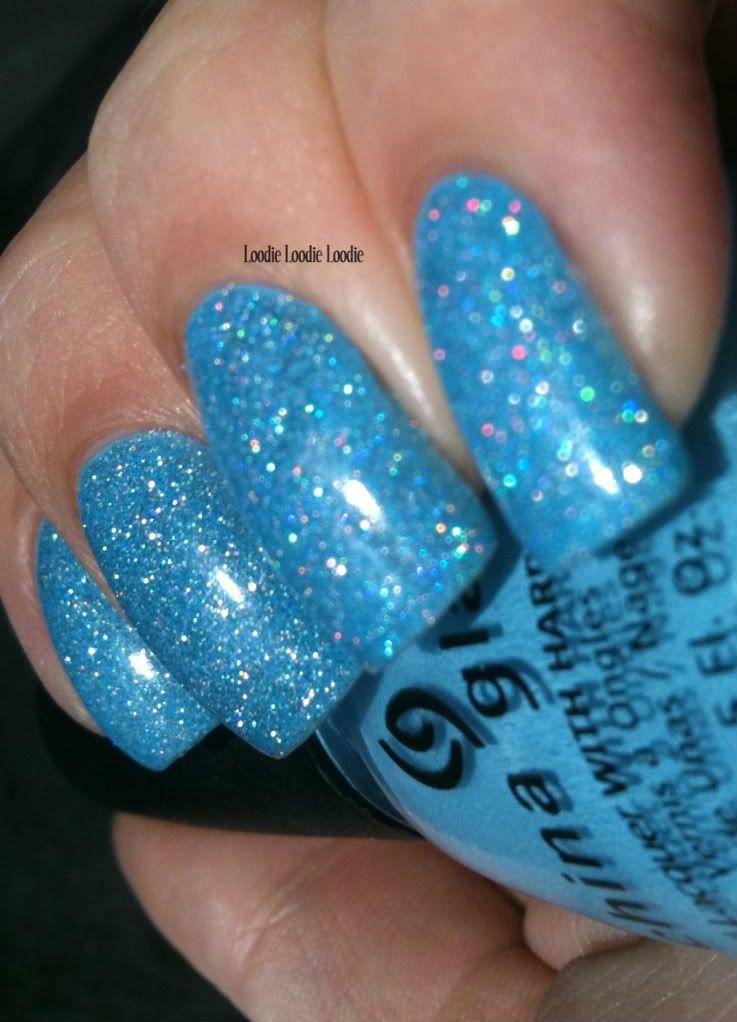
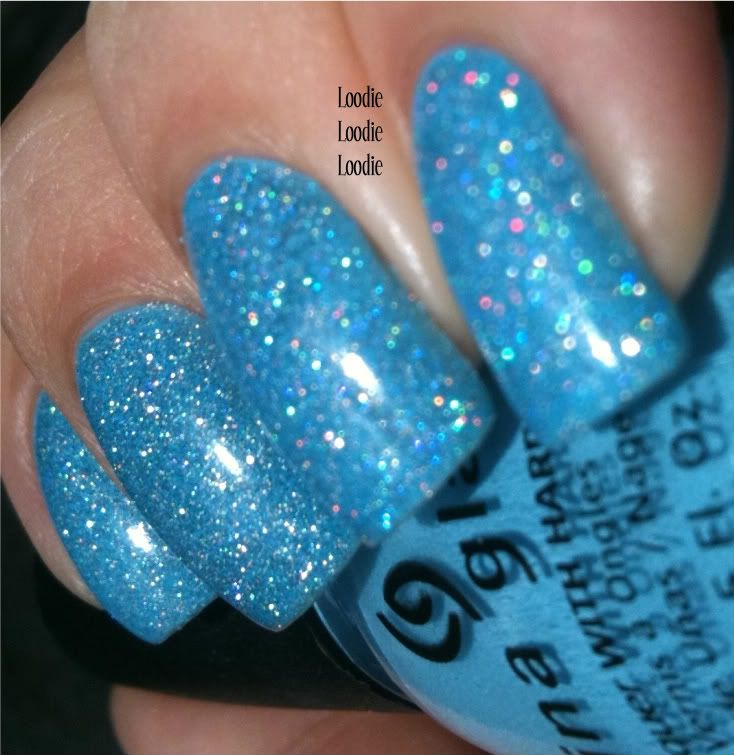
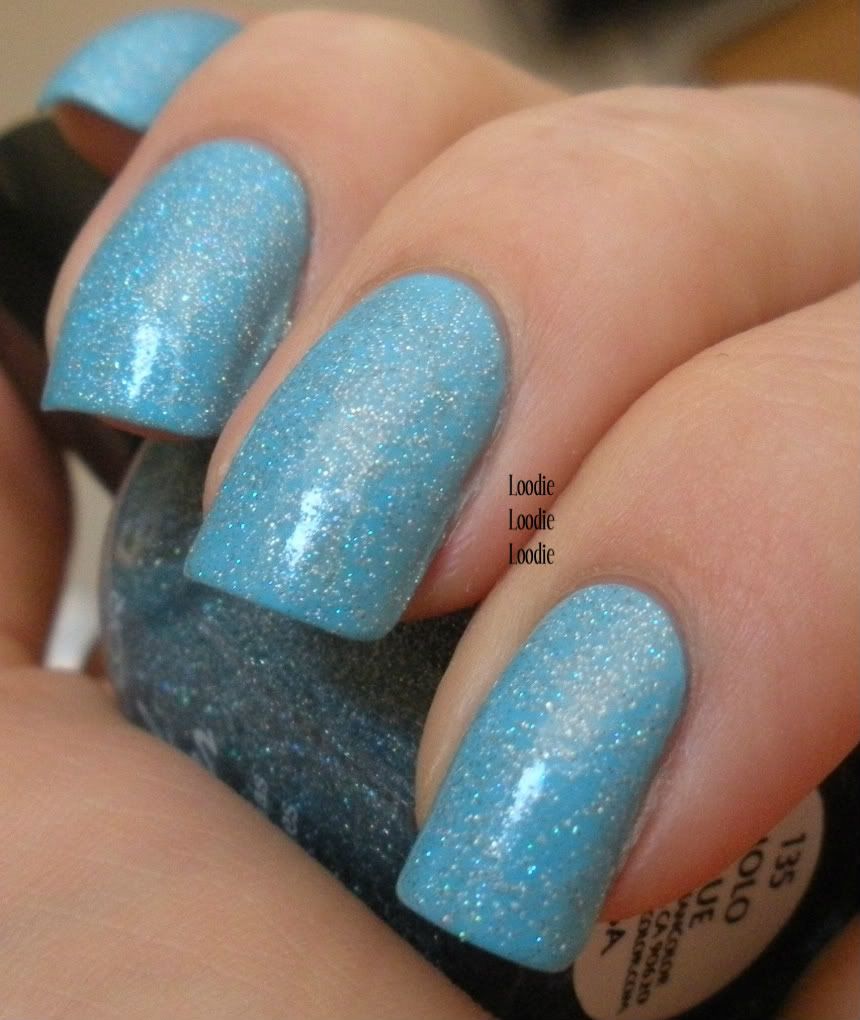
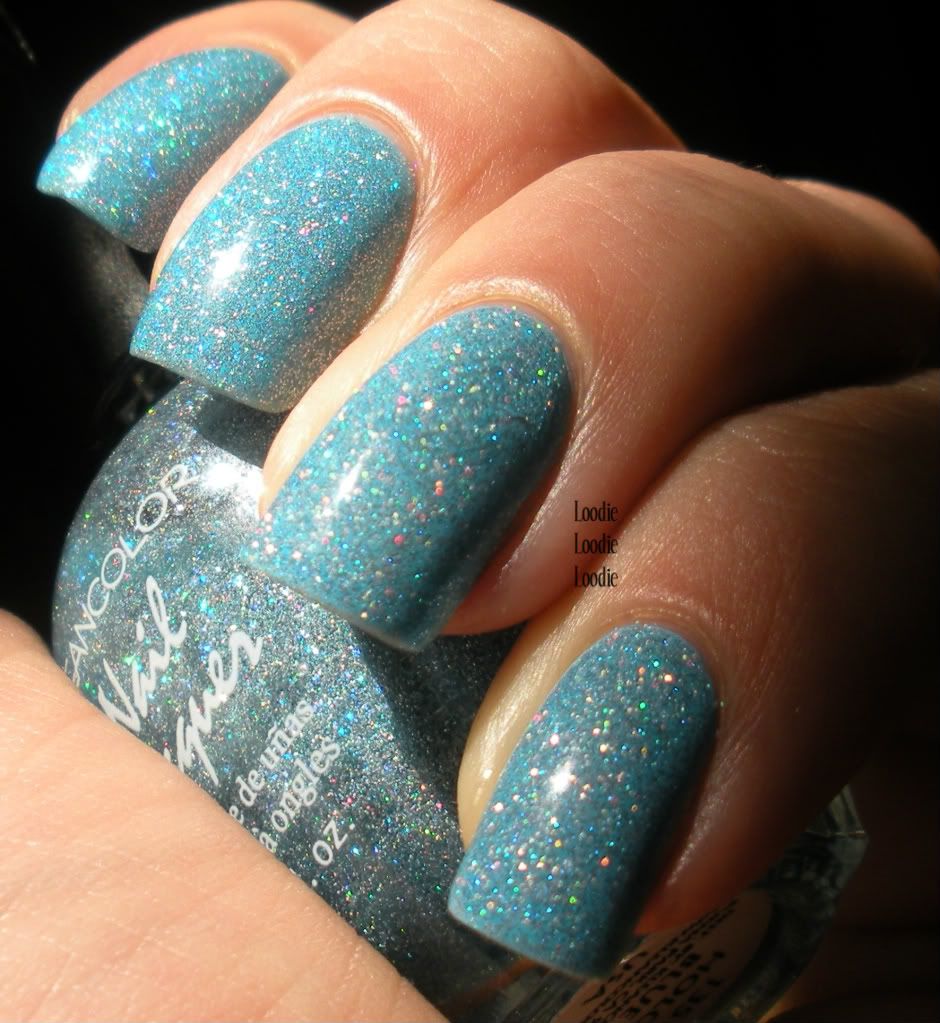
Then I applied one coat of KleanColor Blue Holo 135.

I applied a second coat of KleanColor Blue Holo and top coat.
This picture shows two coats of KleanColor Blue Holo on top of China Glaze - Bahamian Escape with topcoat.
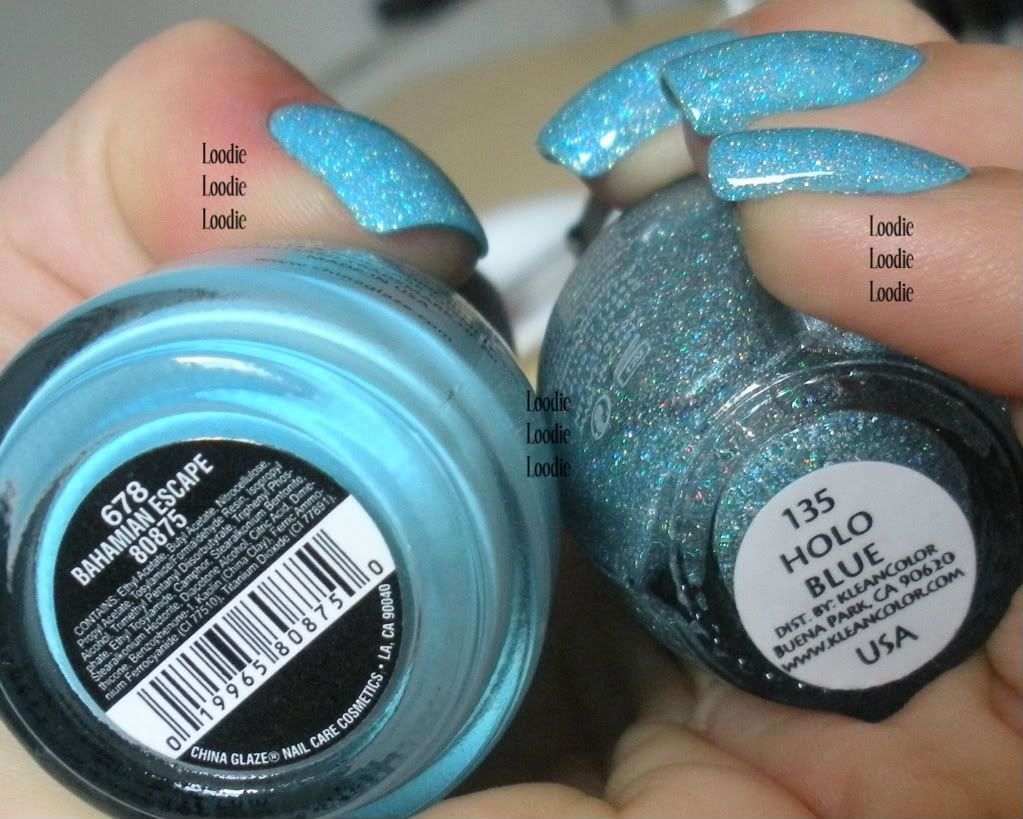
The bottle shots are made even more lovely with my gargantuan hands!
Final Manicure:
Base: Nail Life Nail Revitalizer
Color: 1 coat China Glaze - Bahamian Escape
Color: 2 coats of KleanColor Blue Holo
Top: 1 coat Sally Hansen Clear
Top: 1 coat Poshe

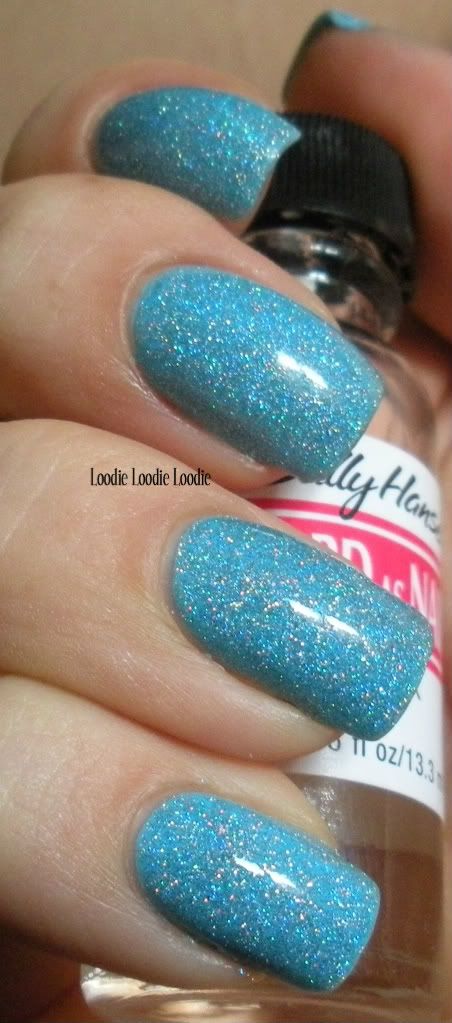
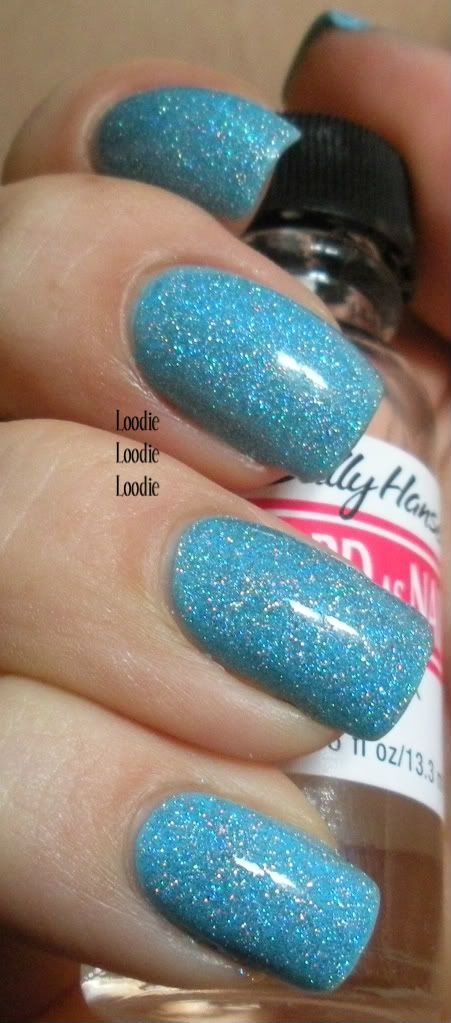
Oh hello sun!

I love the KleanColor Holo's because they give me the sparkle of glitter without the roughness.
Have you tried the stinky-ness of Kleancolor?
The MUA nail boards have inspired my b-day mani!
Hello sparkly goodness!
I love it so much. :D
I have to give thanks to the hubby for actually picking the final manicure. Good job!
This is actually a layered manicure so here is what I used ...
Base: Nail Life Nail Revitalizer
(formaldehyde free)
This is a protein based treatment with moisturizers, you can learn more in this post.
After the base, I applied one coat of the slightly streaky mess that is China Glaze - Bahamian Escape.
Somehow I managed less streaks with my non-dominate hand ...
Then I applied one coat of KleanColor Blue Holo 135.
I applied a second coat of KleanColor Blue Holo and top coat.
This picture shows two coats of KleanColor Blue Holo on top of China Glaze - Bahamian Escape with topcoat.
The bottle shots are made even more lovely with my gargantuan hands!
Final Manicure:
Base: Nail Life Nail Revitalizer
Color: 1 coat China Glaze - Bahamian Escape
Color: 2 coats of KleanColor Blue Holo
Top: 1 coat Sally Hansen Clear
Top: 1 coat Poshe
Oh hello sun!
I love the KleanColor Holo's because they give me the sparkle of glitter without the roughness.
Have you tried the stinky-ness of Kleancolor?
Monday, July 18, 2011
Formaldehyde vs. Formaldhehyde Resin
This is a pretty popular match up on the MUA nail boards, so I thought I would clear things up in a very scientific and boring way. Get your pillows folks. I promise to show you something pretty in the beginning and the end though! :)
First a little eye candy:
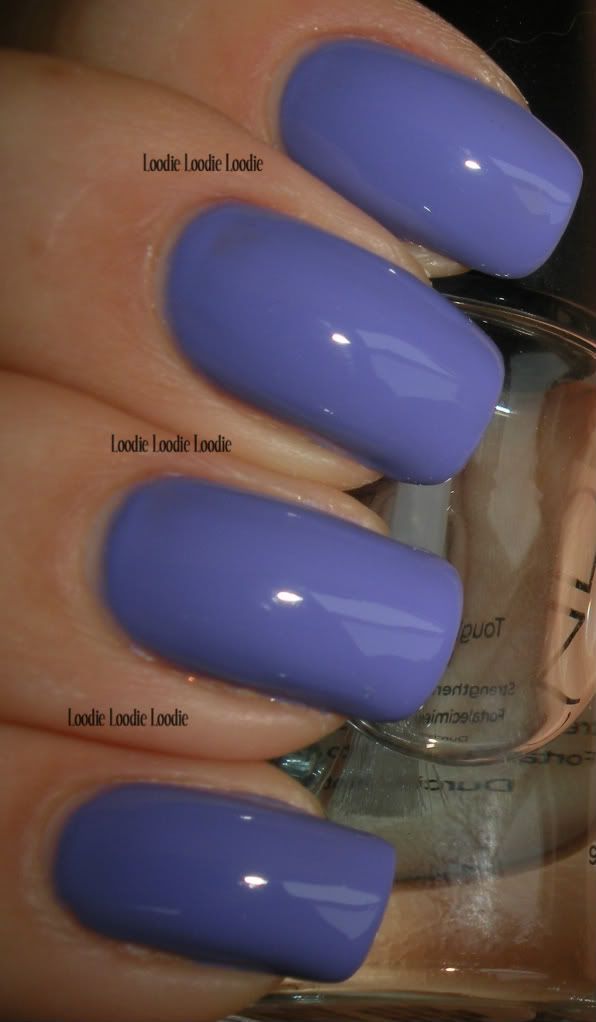 Color Club - Pucci-licious
2 coats. I swear I couldn't see that bald spot on my middle finger in person.
Hubba Hubba! I love this purple. Uh yea, so my camera likes to make it blue. Rebecca, however, has some nice pictures of it here. It dries really fast to a semi-matte finish. I always like to shine it up with topcoat!
Now lets talk about Formaldehyde vs Formaldehyde Resin
Formaldehyde:
The name itself gets used incorrectly constantly. I myself do it all the time because it is still incorrectly written on many ingredient lists. So let's clear things up. Formaldehyde is actually a gas. It can not exist in your hardener/treatment in this form. Unless you're gassing your nails, wtf does that mean I don't know, it usually exists as a liquid. Formaldehyde mixed with water makes a totally new compound (with its own physical and chemical properties) called Formalin, or even more accurate Methylene Glycol. This is the chemical that is put in hardeners and the correct name that companies should be using. The naming misnomer is a relic of the past, which you can read about further here.
Formaldehyde gas is the real "poison" that can cause cancer. However, even then you would have to inhale formaldehyde gas in large doses and for long periods of time. I am talking about the type of exposure one would get in a formaldehyde manufacturing plant and not from nail treatments/hardeners evaporating.
So unless you have sensitivity to formaldehyde gas don't allow the fear mongering to rule your life. Do your own research and always use common sense.
Need a nail hardener? This series may be of use.
Formaldehyde Resin:
Formaldehyde Resin (or you may see it on ingredient lists as Tosylamide/Formaldehyde Resin or TSFR) is an ingredient in nail polish used to add flexibility and improves adhesion to the nail plate.
Formaldehyde gas is used in the production of Formaldehyde Resin, however when all is said and done it's a completely different chemical. There may be traces of formaldehyde gas left in the formaldehyde resin, but they are in the same concentration levels found in some foods, even organic foods. Uh, yea, so unless you have an allergy to organic grown apples, there is very little health risk (both of the allergy or cancer type).
Again, do your own research and use common sense.
The shortest conclusion ever:
Formaldehyde (gas) =/= Formalin =/= Formaldehyde Resin
There is very little in common with these chemicals. OH if you're confused, =/= means 'does NOT equal', mmm kay?
Eye Candy Time!
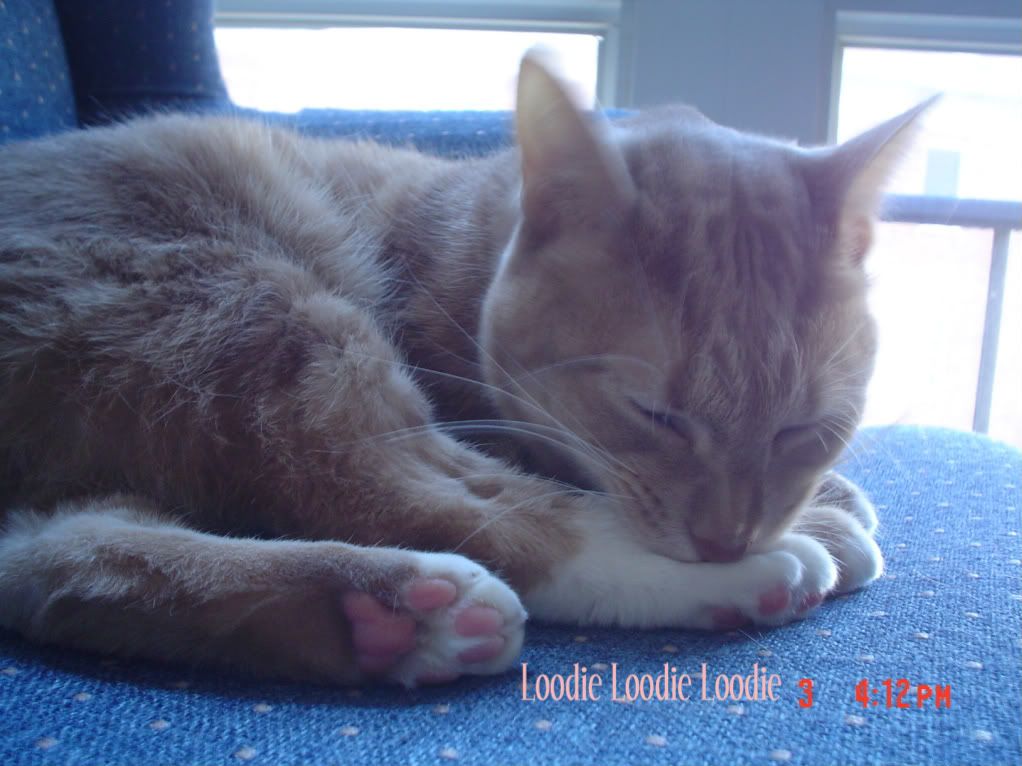 That's my cat eating his own foot.
LOL
First a little eye candy:
2 coats. I swear I couldn't see that bald spot on my middle finger in person.
Hubba Hubba! I love this purple. Uh yea, so my camera likes to make it blue. Rebecca, however, has some nice pictures of it here. It dries really fast to a semi-matte finish. I always like to shine it up with topcoat!
Now lets talk about Formaldehyde vs Formaldehyde Resin
Formaldehyde:
The name itself gets used incorrectly constantly. I myself do it all the time because it is still incorrectly written on many ingredient lists. So let's clear things up. Formaldehyde is actually a gas. It can not exist in your hardener/treatment in this form. Unless you're gassing your nails, wtf does that mean I don't know, it usually exists as a liquid. Formaldehyde mixed with water makes a totally new compound (with its own physical and chemical properties) called Formalin, or even more accurate Methylene Glycol. This is the chemical that is put in hardeners and the correct name that companies should be using. The naming misnomer is a relic of the past, which you can read about further here.
Formaldehyde gas is the real "poison" that can cause cancer. However, even then you would have to inhale formaldehyde gas in large doses and for long periods of time. I am talking about the type of exposure one would get in a formaldehyde manufacturing plant and not from nail treatments/hardeners evaporating.
So unless you have sensitivity to formaldehyde gas don't allow the fear mongering to rule your life. Do your own research and always use common sense.
Need a nail hardener? This series may be of use.
Formaldehyde Resin:
Formaldehyde Resin (or you may see it on ingredient lists as Tosylamide/Formaldehyde Resin or TSFR) is an ingredient in nail polish used to add flexibility and improves adhesion to the nail plate.
Formaldehyde gas is used in the production of Formaldehyde Resin, however when all is said and done it's a completely different chemical. There may be traces of formaldehyde gas left in the formaldehyde resin, but they are in the same concentration levels found in some foods, even organic foods. Uh, yea, so unless you have an allergy to organic grown apples, there is very little health risk (both of the allergy or cancer type).
Again, do your own research and use common sense.
The shortest conclusion ever:
Formaldehyde (gas) =/= Formalin =/= Formaldehyde Resin
There is very little in common with these chemicals. OH if you're confused, =/= means 'does NOT equal', mmm kay?
Eye Candy Time!
LOL
Wednesday, July 13, 2011
What's better than kitties and polish?
If you're an old spinster like me the answer to that question is ... nothing ...
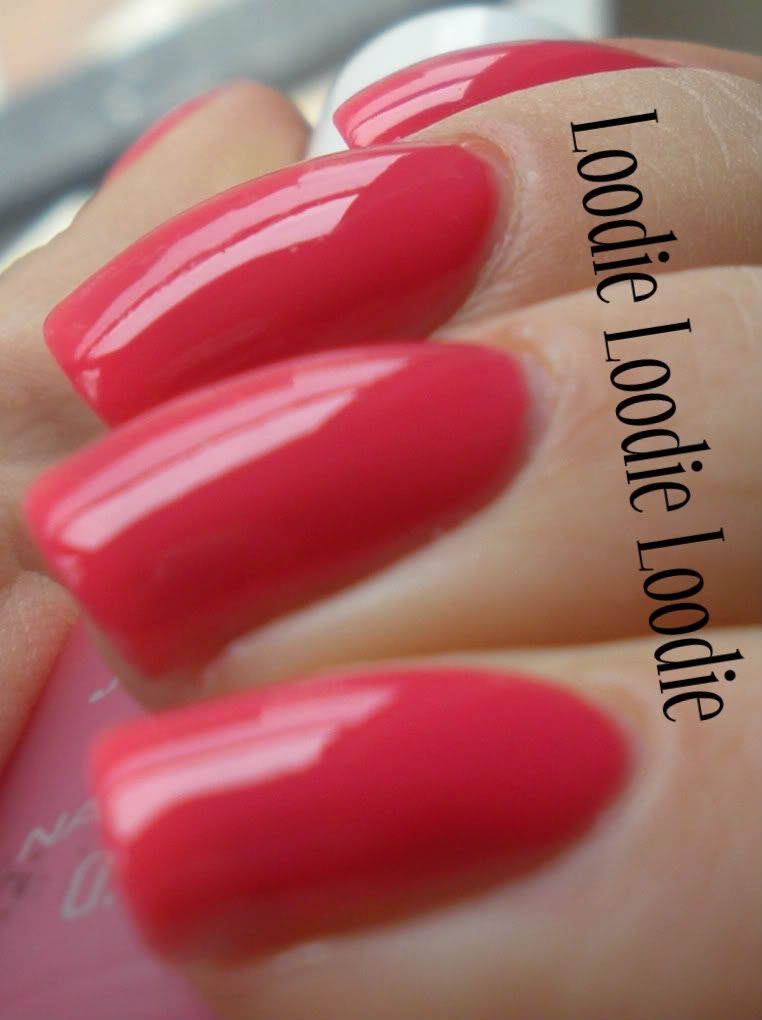
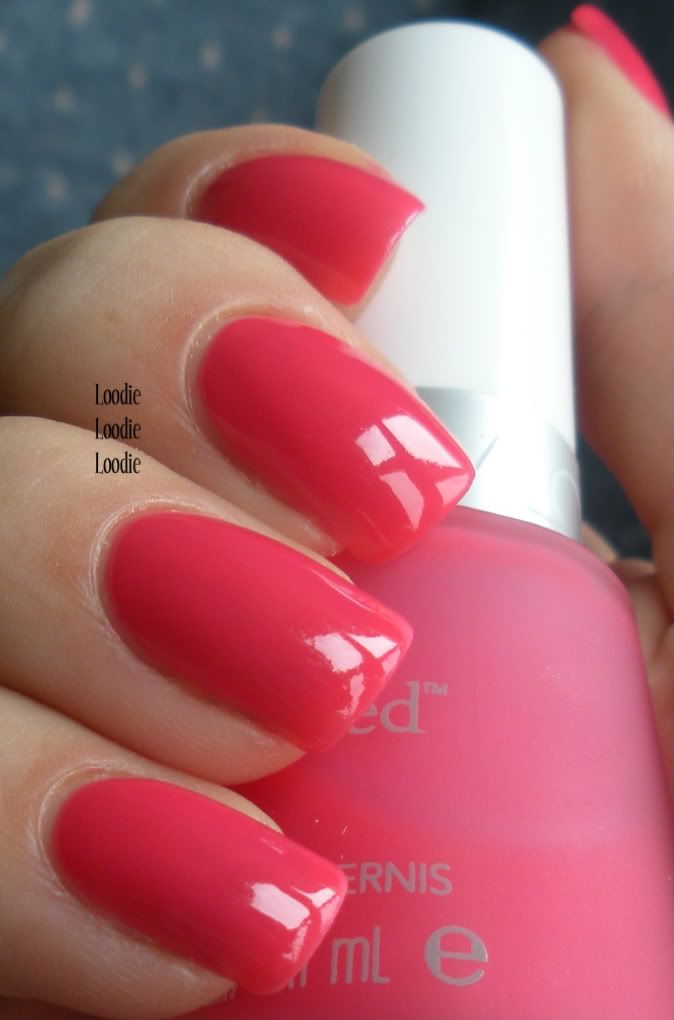
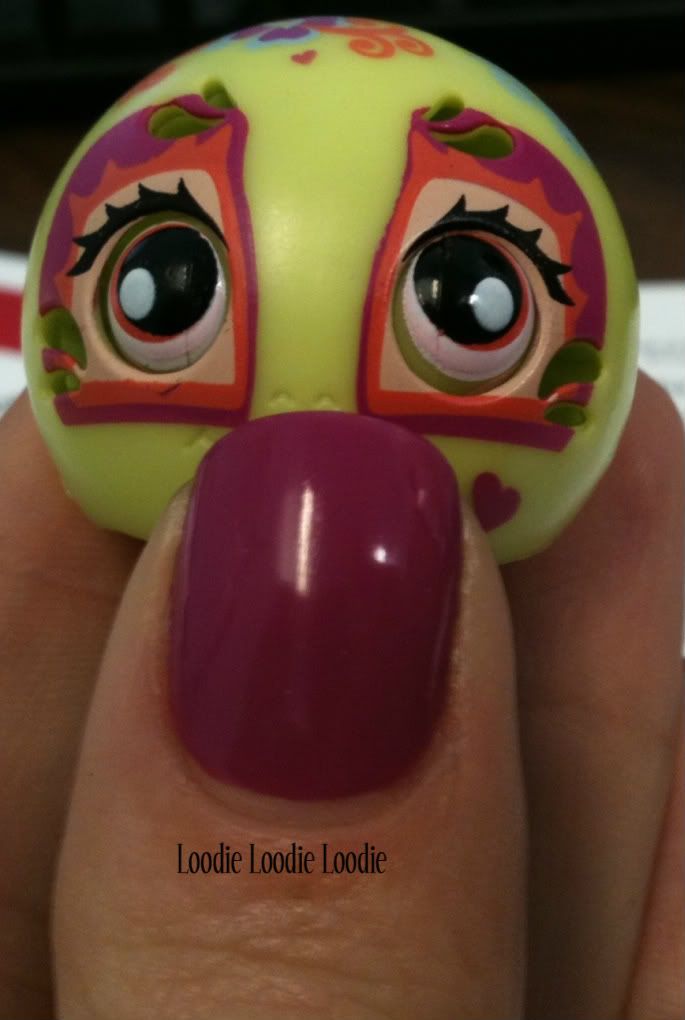
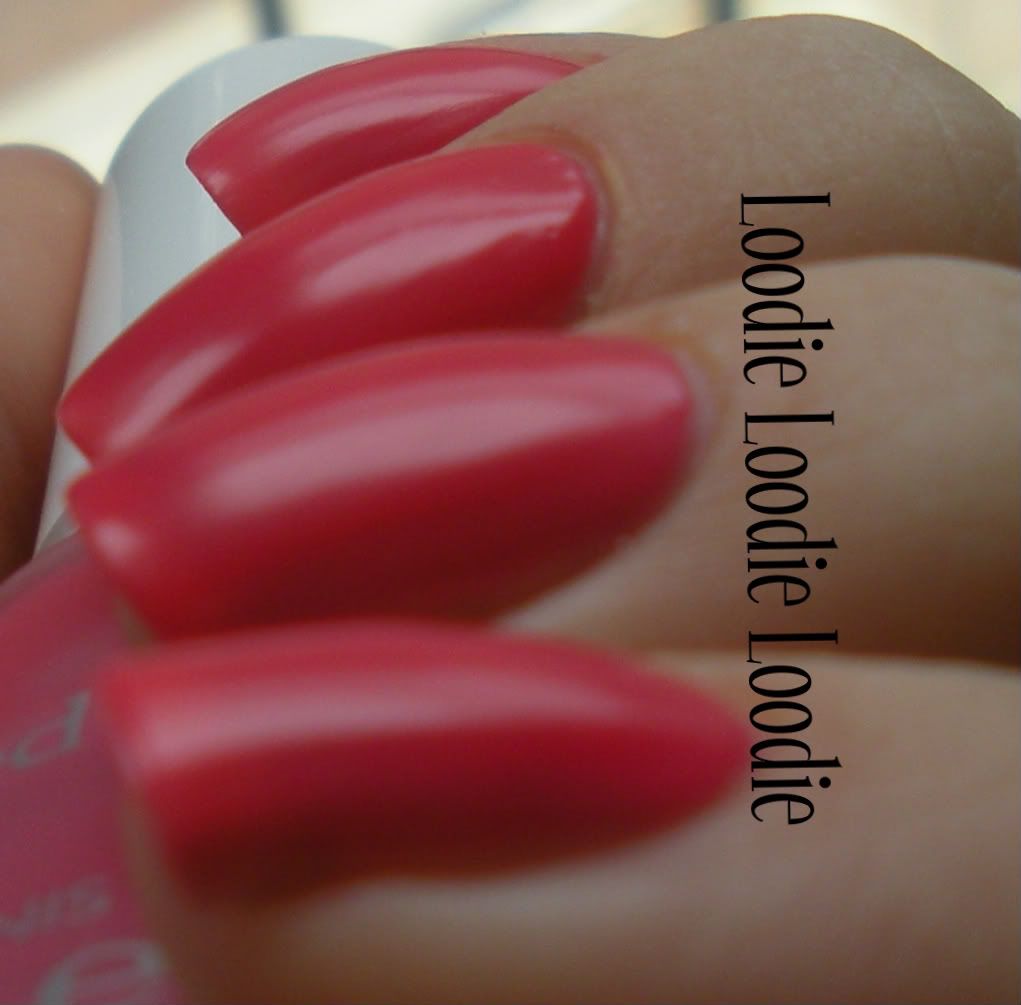 Revlon Tinted - Victorian
This color is right in line with my spring/summer mood. Solveig and I have been on the same wavelength lately :D
This is either 3 or 4 coats. Sorry, spinster status means I'm old and forgetful.
This picture is without topcoat. You can see the finish is like satin, very velvety (see next picture for topcoat).
 This polish is coral in nature, but I wish it was more bottle color. It doesn't quite lean pink like I want it to.
 See what I mean about the bottle color. I want that bottle color!
It's still a nice coral on the nail though.
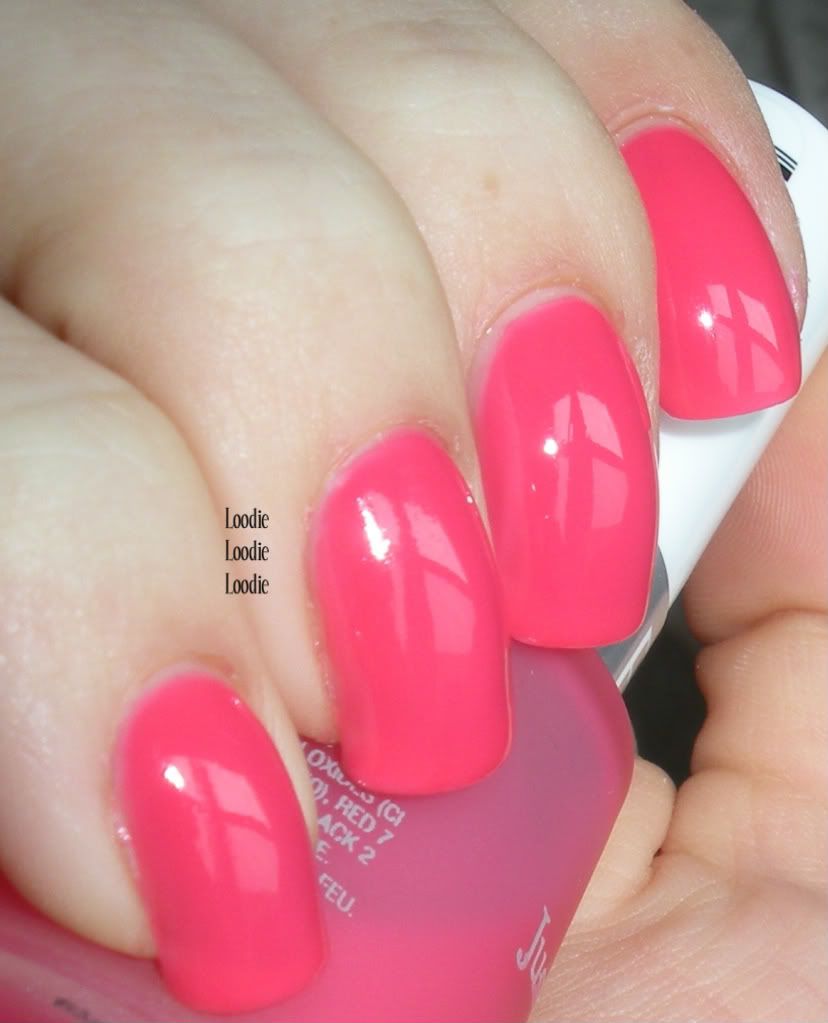 When flash is involved it certainly looks more pink and has a neon quality to it.
Now on to the kitties!!!
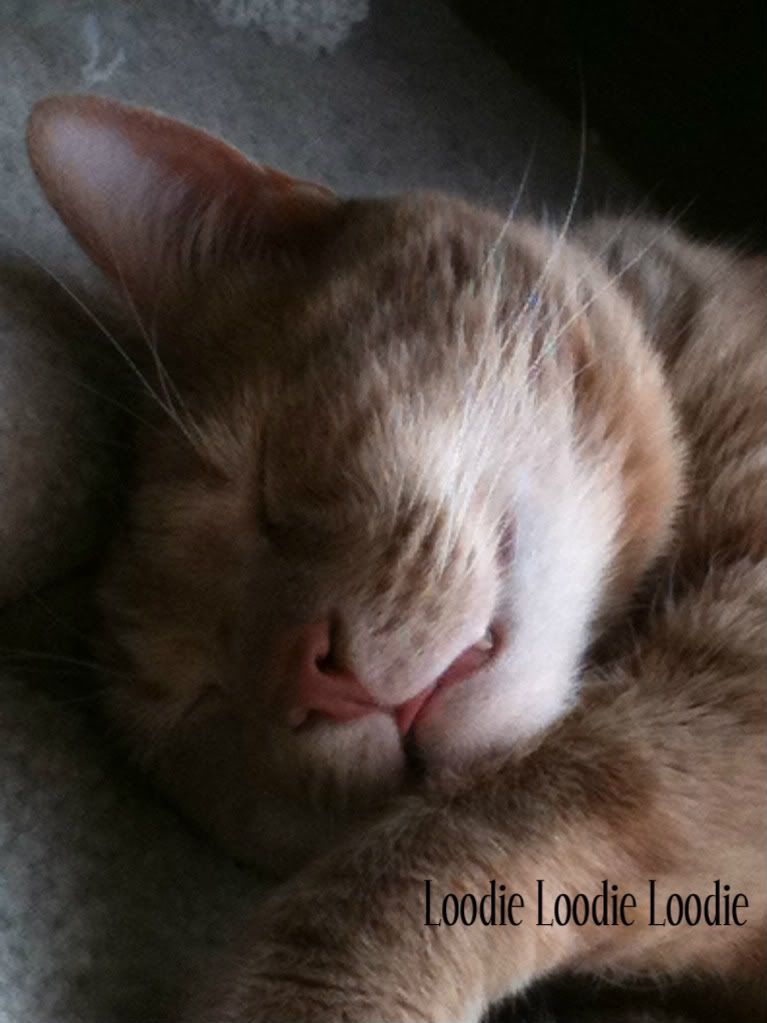 Isn't it funny when cats sleep so hard their tongue comes out, lol.
 When he's not sleeping super cute, he tries to look real cool on the couch.
 He has a friend that also likes to keep it cool (or rather warm it up) on my computer.
WTH cat?
How am I suppose tostalk MUA nail boards work on my dissertation?
This color is right in line with my spring/summer mood. Solveig and I have been on the same wavelength lately :D
This is either 3 or 4 coats. Sorry, spinster status means I'm old and forgetful.
This picture is without topcoat. You can see the finish is like satin, very velvety (see next picture for topcoat).
It's still a nice coral on the nail though.
Now on to the kitties!!!
WTH cat?
How am I suppose to
Monday, July 11, 2011
Is it 4th of July yet?
Oh wait, that was like a week ago. If you haven't realized already, I am super slow. It's no surprise this is a week late. Actually I am a bit surprised I didn't post it even later.
I hardly ever plan holiday themed manicures, because that just seems like too much work. However, I actually felt like it. Funny, thing though, this was my July 3rd mani. I got bored of it by the forth. lol A super awesome polish followed.
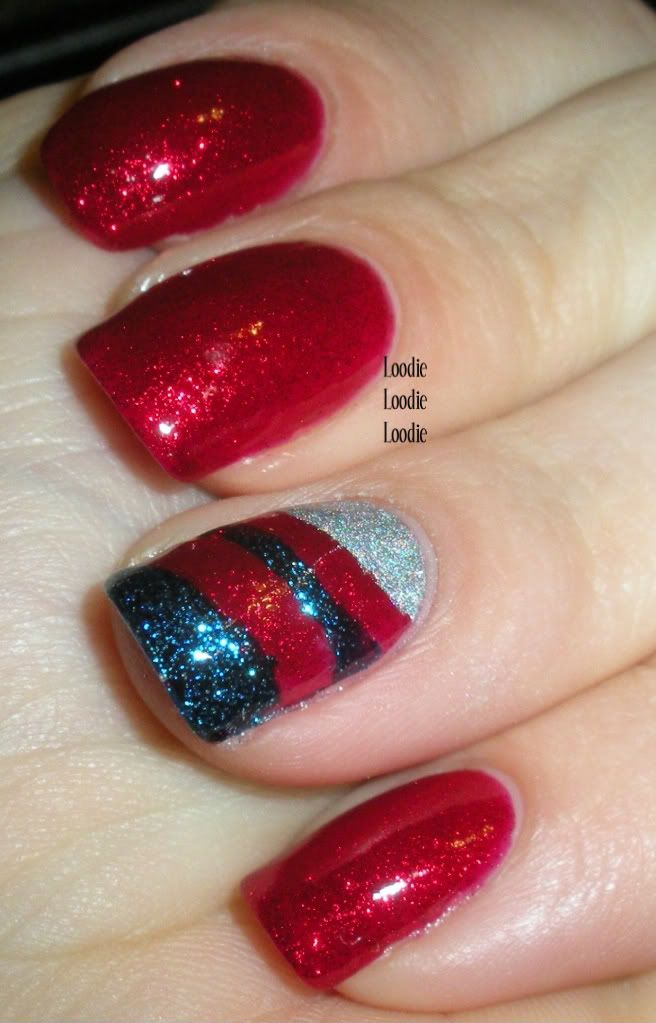 China Glaze - Ruby Pumps
China Glaze - Dorothy Who?
Color Club - Worth the Risque
I have to admit I kinda suck at this tape stuff. It would help if I actually waited for the polish to dry lol. Oh and I just read that making the tape less sticky by sticking it on your skin a few times helps. I need to try that next time.
My niece was loving the stripes so she asked me to do something similar.

Well my real July 4th manicure was ...
 The freaking gorgeous
Rimmel - Night Before
615
This is a pretty special polish because it has so many flashes of pure love.
Essentially this polish is purple with shimmer.
BUT OH THE SHIMMER!!! So many colors.
 Pinks, reds, yellows and greens oh my!
I have included lots of pictures to show all of its faces.
 The yellow and green are very subtle and I would not call this a duochrome at all.
This was two coats, but you could possibly get away with one.
Also this guy dries in 60 seconds so that's pretty cool.
 Shimmer!!!
Love this guy!
I hardly ever plan holiday themed manicures, because that just seems like too much work. However, I actually felt like it. Funny, thing though, this was my July 3rd mani. I got bored of it by the forth. lol A super awesome polish followed.
China Glaze - Dorothy Who?
Color Club - Worth the Risque
I have to admit I kinda suck at this tape stuff. It would help if I actually waited for the polish to dry lol. Oh and I just read that making the tape less sticky by sticking it on your skin a few times helps. I need to try that next time.
My niece was loving the stripes so she asked me to do something similar.

Well my real July 4th manicure was ...
Rimmel - Night Before
615
This is a pretty special polish because it has so many flashes of pure love.
Essentially this polish is purple with shimmer.
BUT OH THE SHIMMER!!! So many colors.
I have included lots of pictures to show all of its faces.
This was two coats, but you could possibly get away with one.
Also this guy dries in 60 seconds so that's pretty cool.
Love this guy!
Tuesday, July 5, 2011
Good God Loodie put your knives away
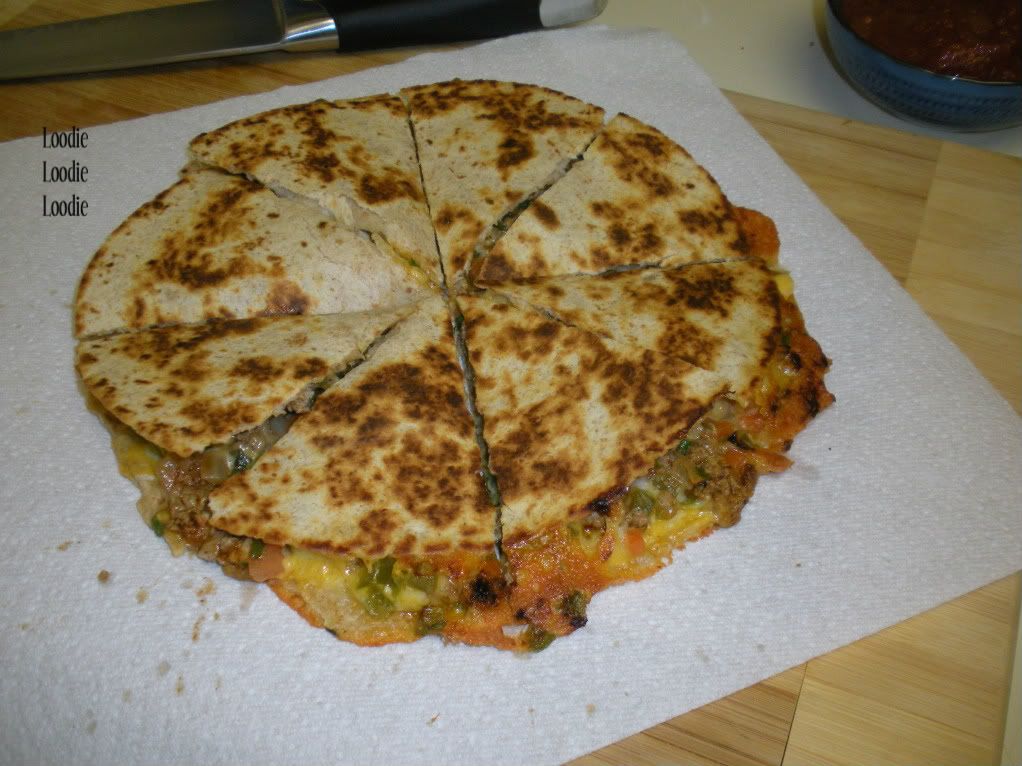
Okay that's a little extreme. That knife in the background was actually the near culprit.
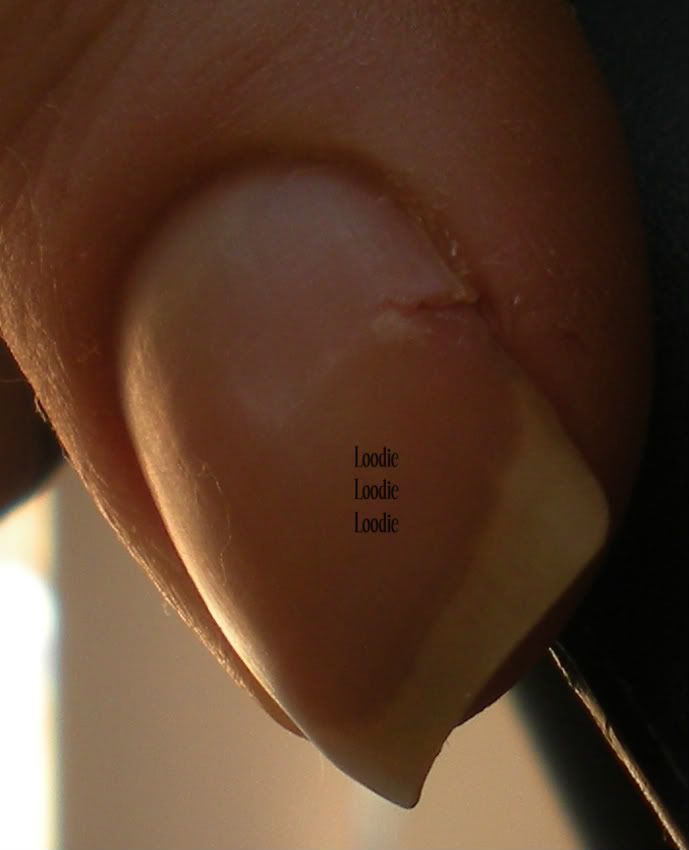
OH the horror. I will spare you the immediate blood and gore, but HOLY CRAP. OUCH.
The quesadilla was delicious though.
Can we just take a moment of silence please.
IT'S SO FAR DOWN!!
Waaaaaaaa
Don't worry, there is a happy ending.
Lucky for me life is not like "Death Becomes Her"
Not only do nails grow, but thank goodness for Shellac.
I fix my nail boo boo's with soak of nail gels.
You can find that tutorial here.
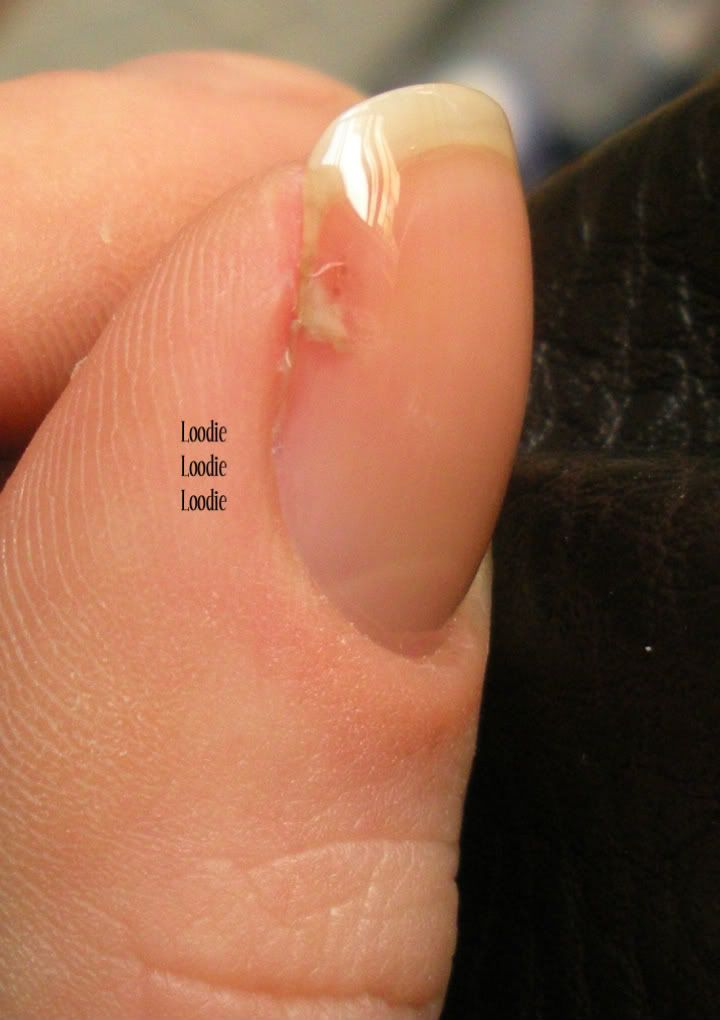
Protected ... and SHINY :D
This is actually a week later, so the cut has healed. :)
Gosh this regrowth is gonna take awhile.
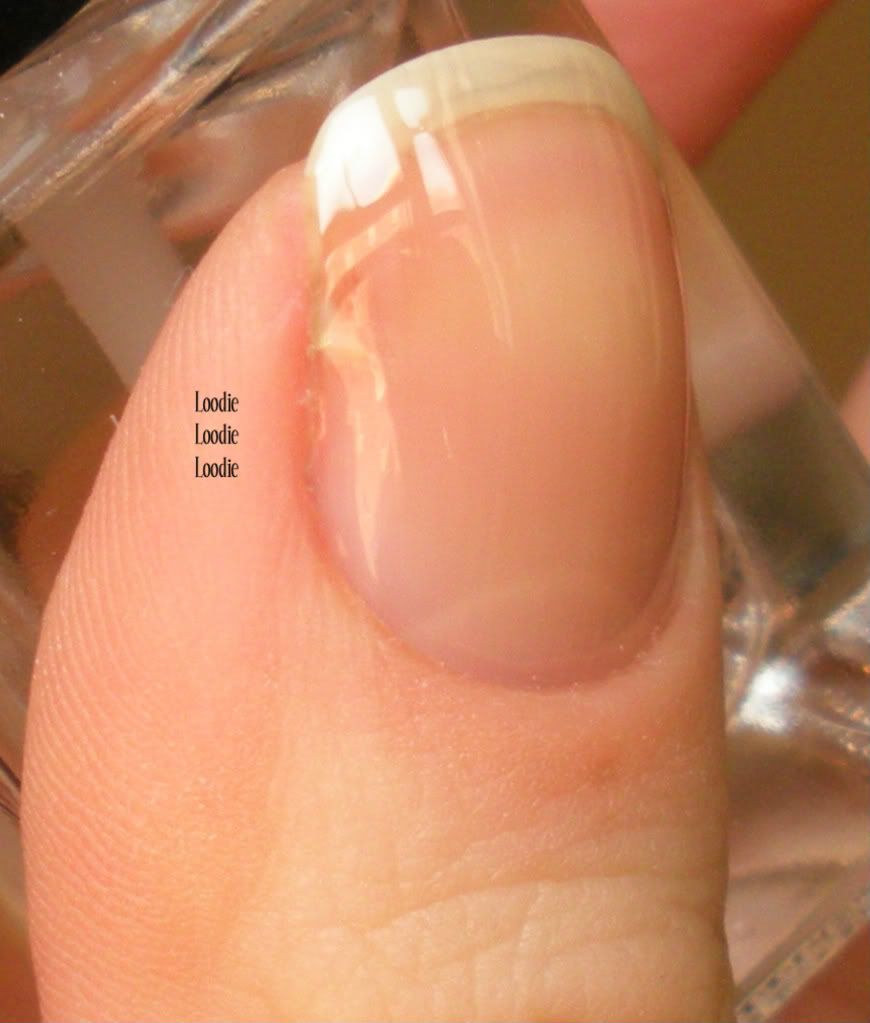
YAY!!
China Glaze - Nasty
Sorry for the large gap, this picture is from a wear test.
Friday, July 1, 2011
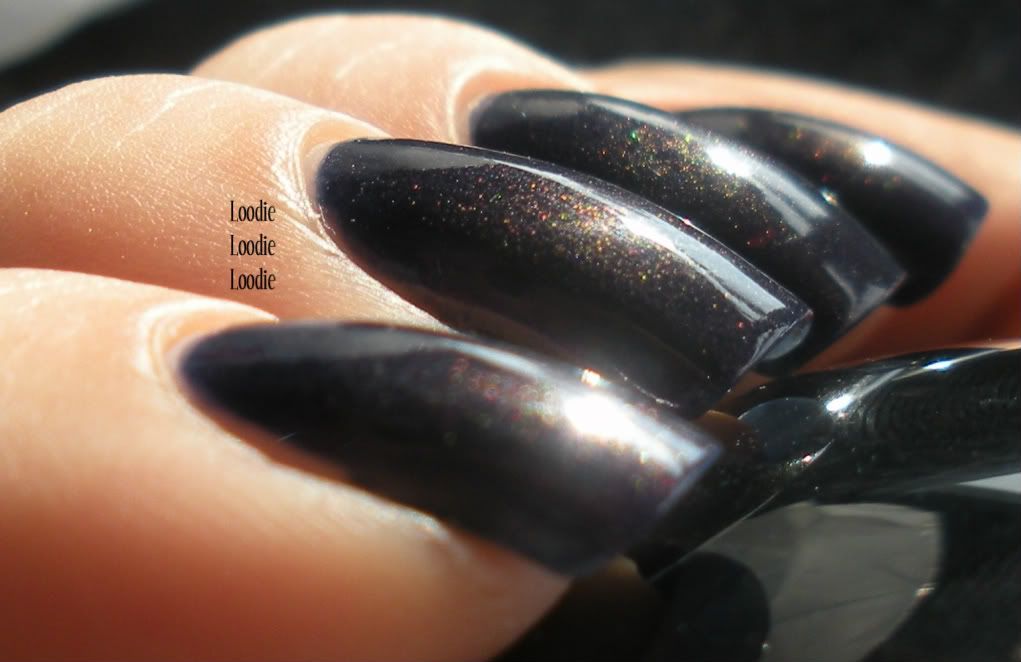
My Dirty Jet
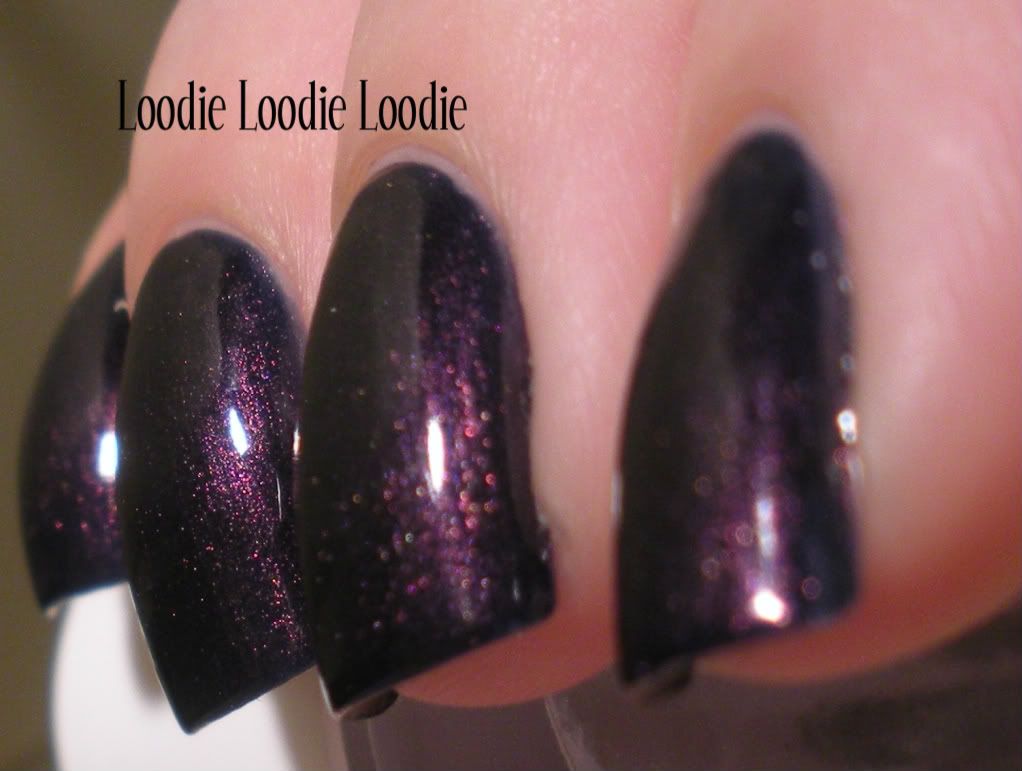
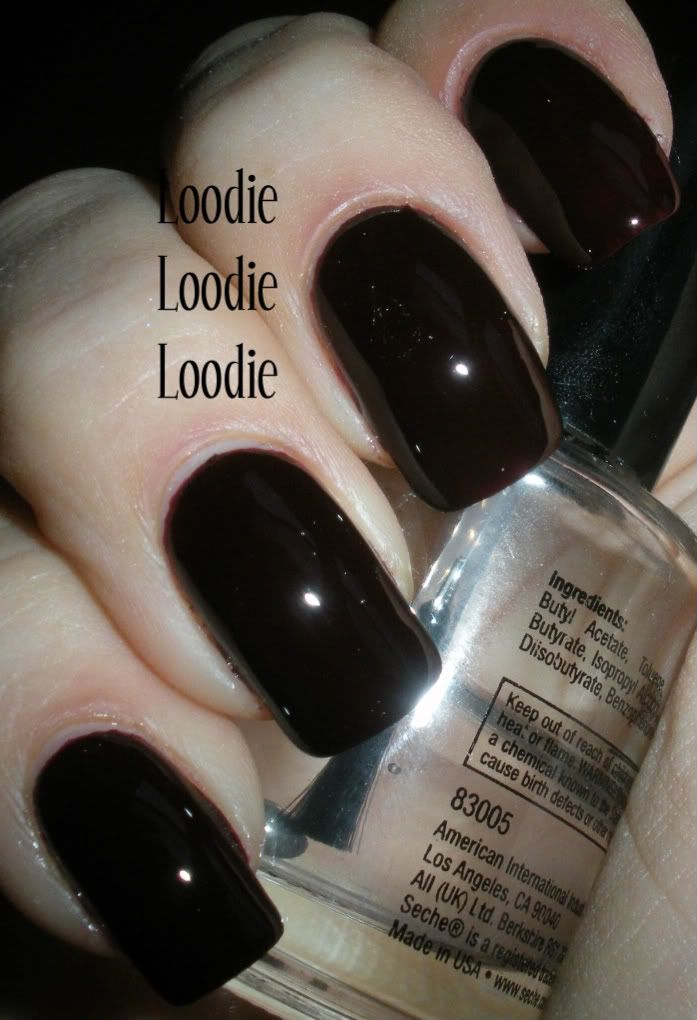
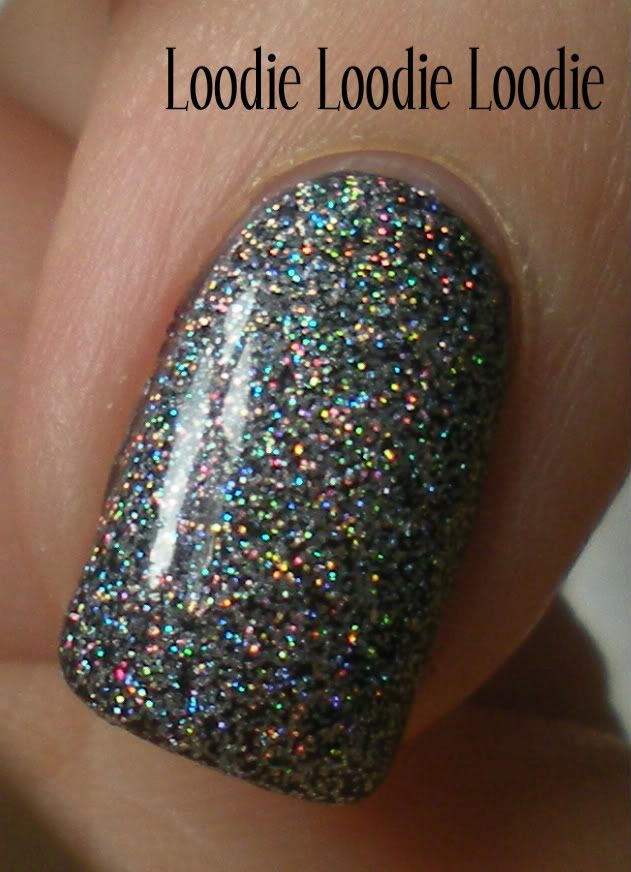
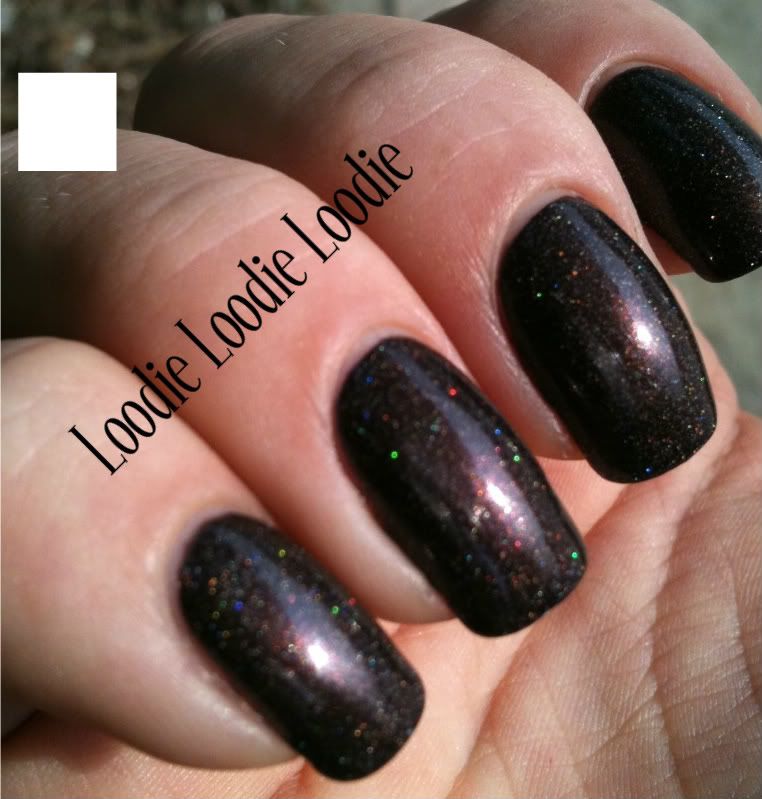
Ummm so I accidentally made a dupe of a OPI's defective batch of My Private Jet. Actually, NO not a dupe, it's better :P

I really wanted something brown and burgundy; really rich and delicious. However, after the smoke cleared I some how ended up adding some holo stuff to it and yummy, it became near edible.
(I don't advise the latter)
I probably could have made this more holo; maybe next time. I like this one as it stands.
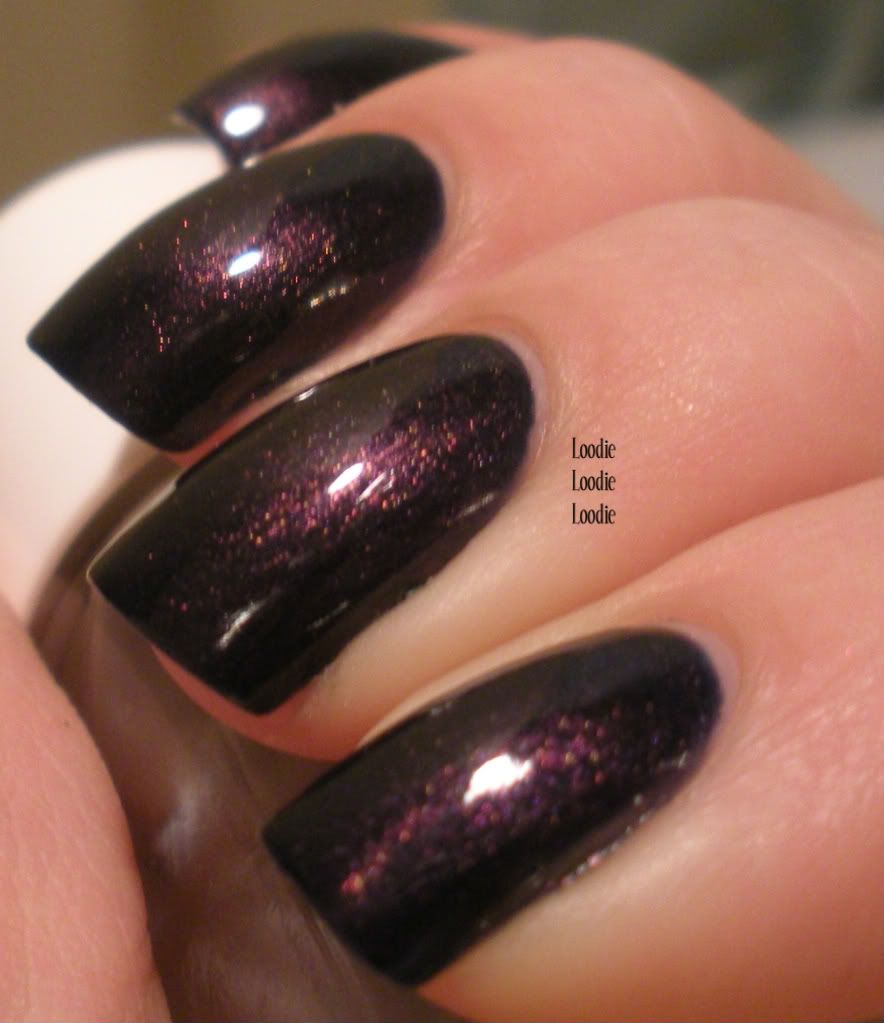
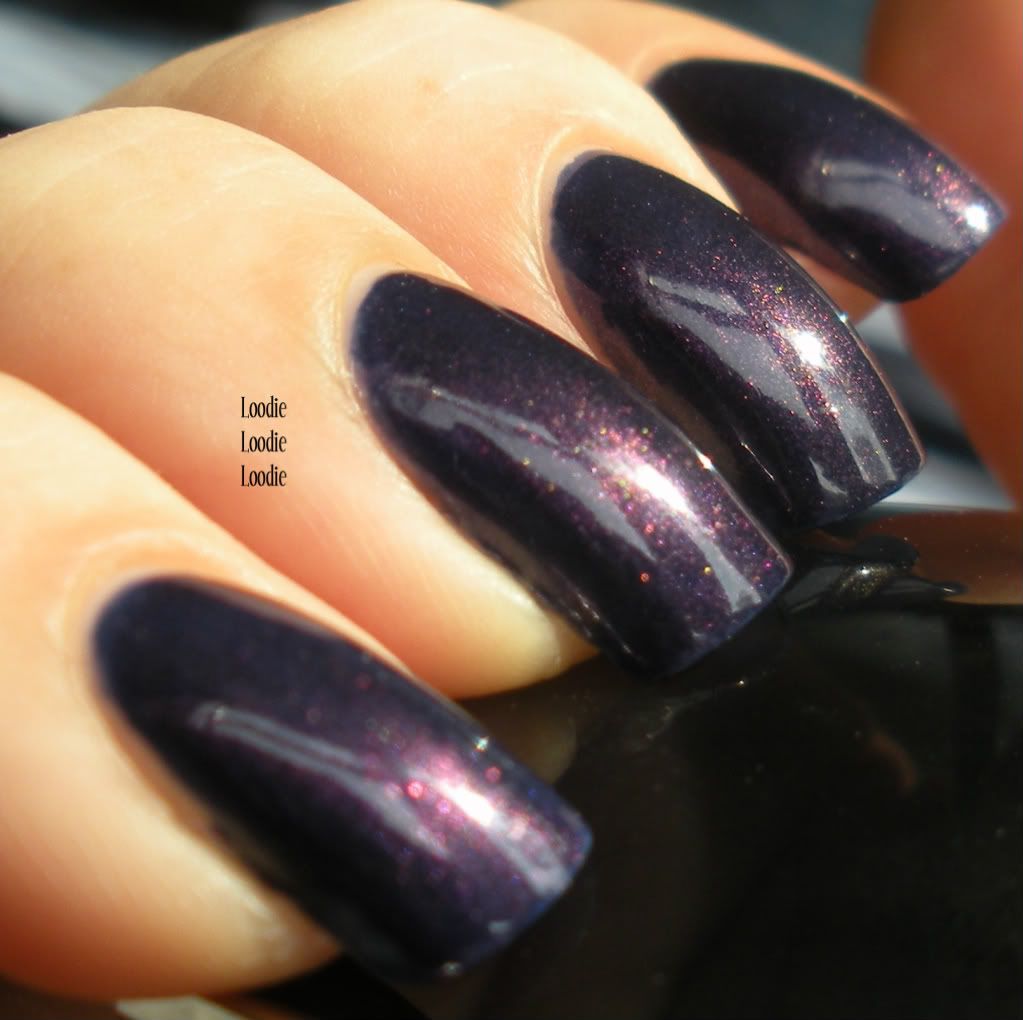
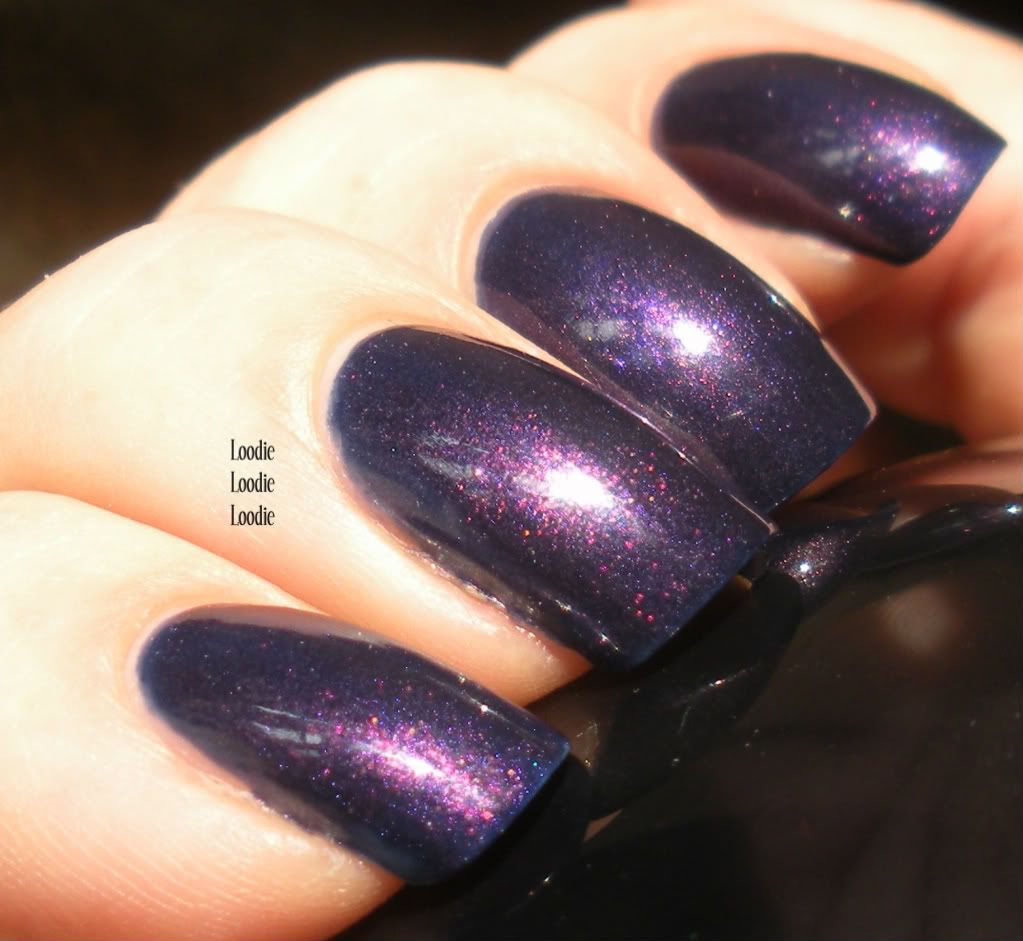
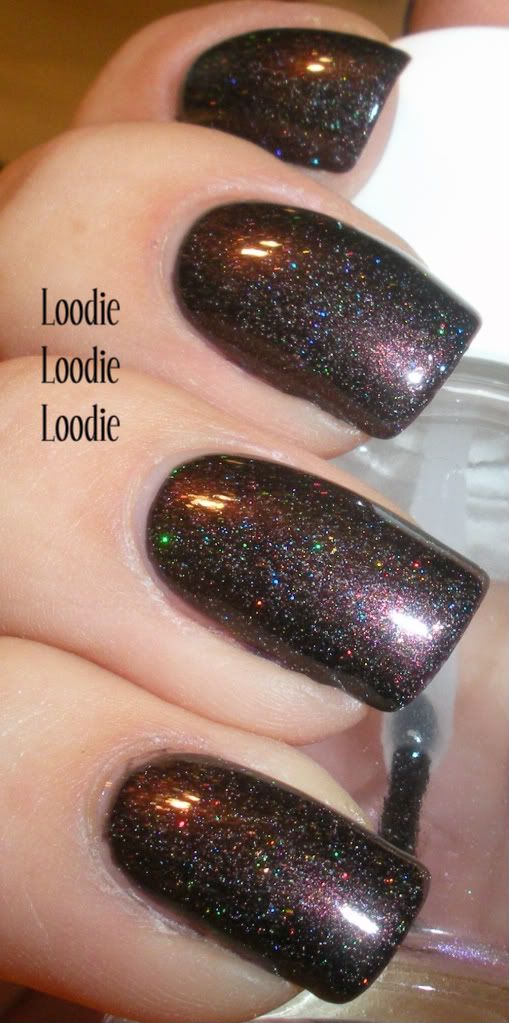
2 coats in the sun <3
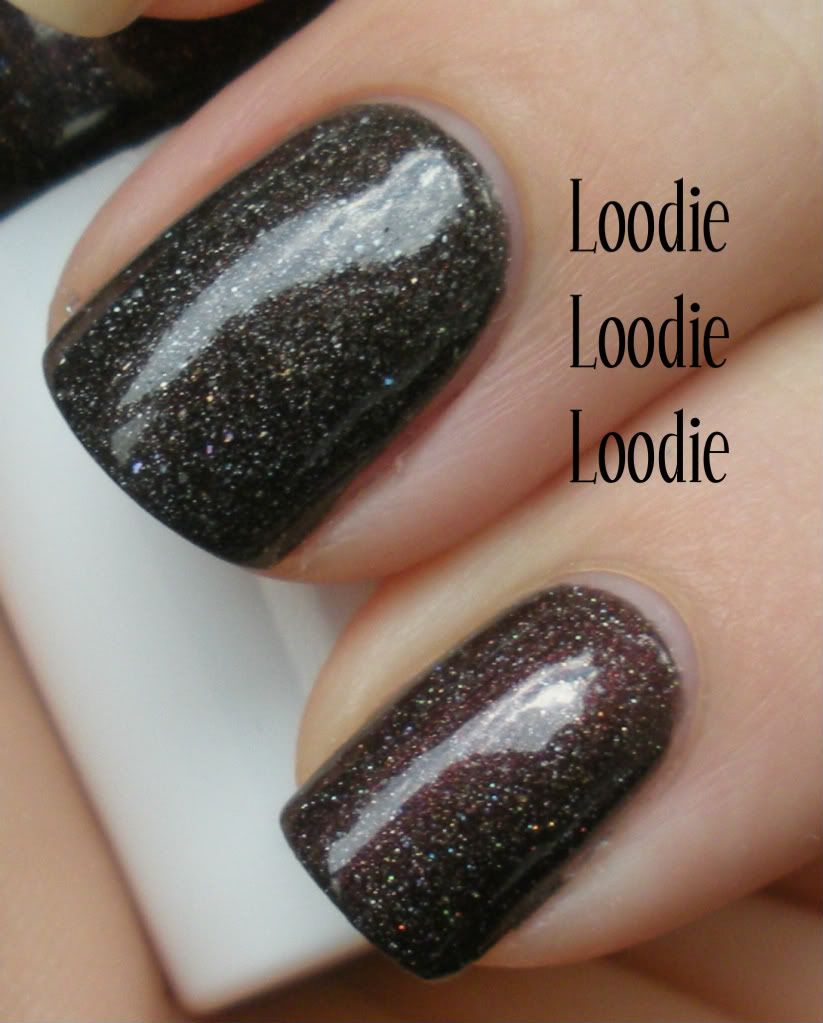
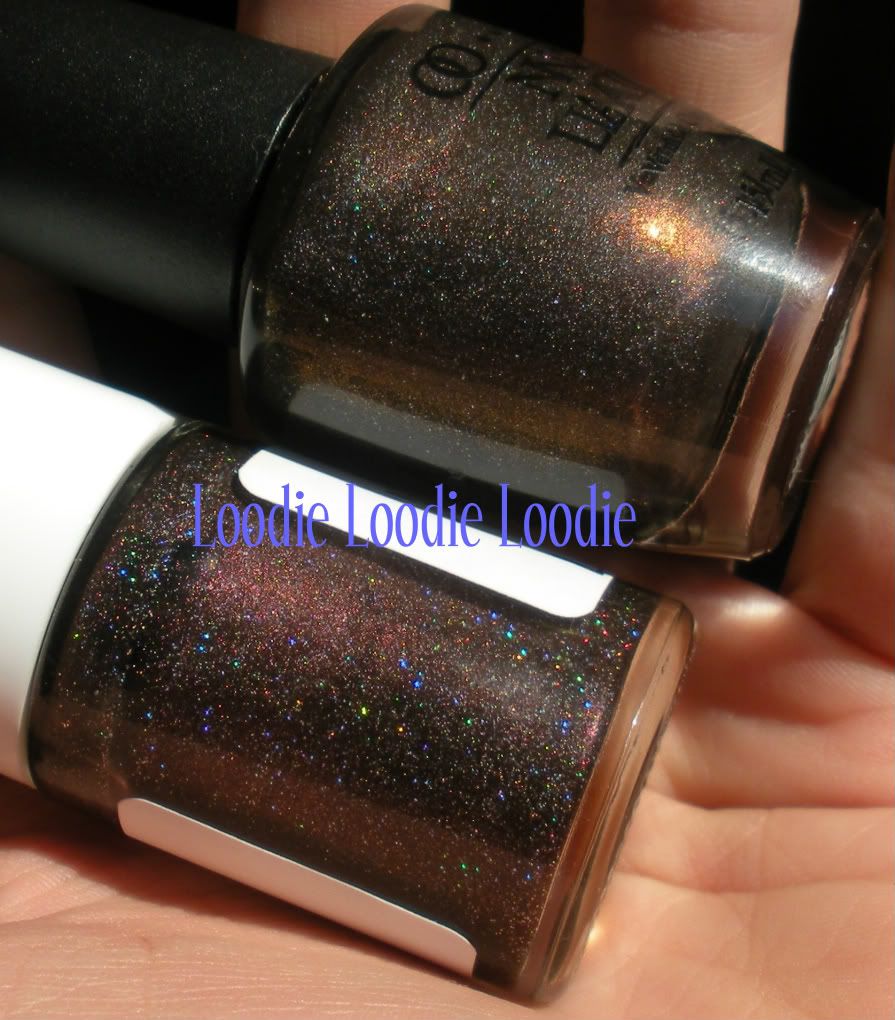
Mine is on the bottom.
Definitely more burgundy.
Bottle pic's next!
Alright here is what I used:

ZOMG if you don't have this you should! China Glaze - Fairy Dust is similar. I'm sure there are others, feel free to leave a comment ...
Color Club - Love Em/Leave Em
Perhaps a more holo version of something would be better
Color Club - Jewel of a Girl
Color Club - Nothing But Truffel
That very first pic is two coats on its own. Now on to the layering ...
OPI Siberian Nights - How lush. I'm a little mad it looks black most of the time though.
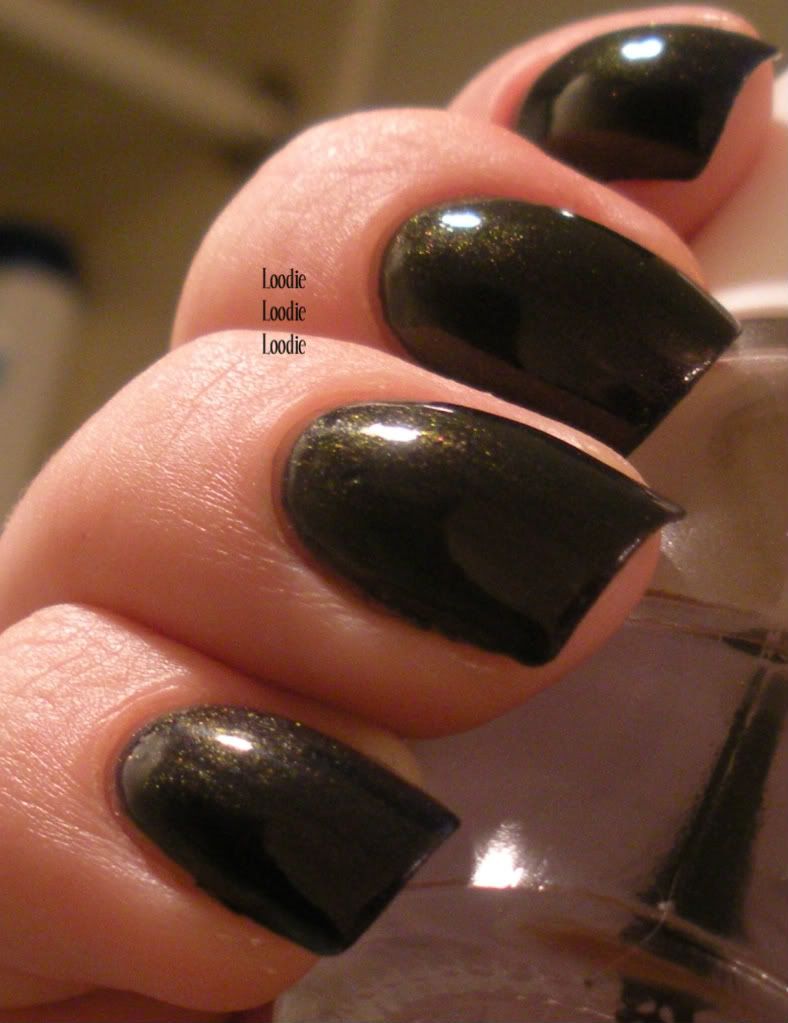
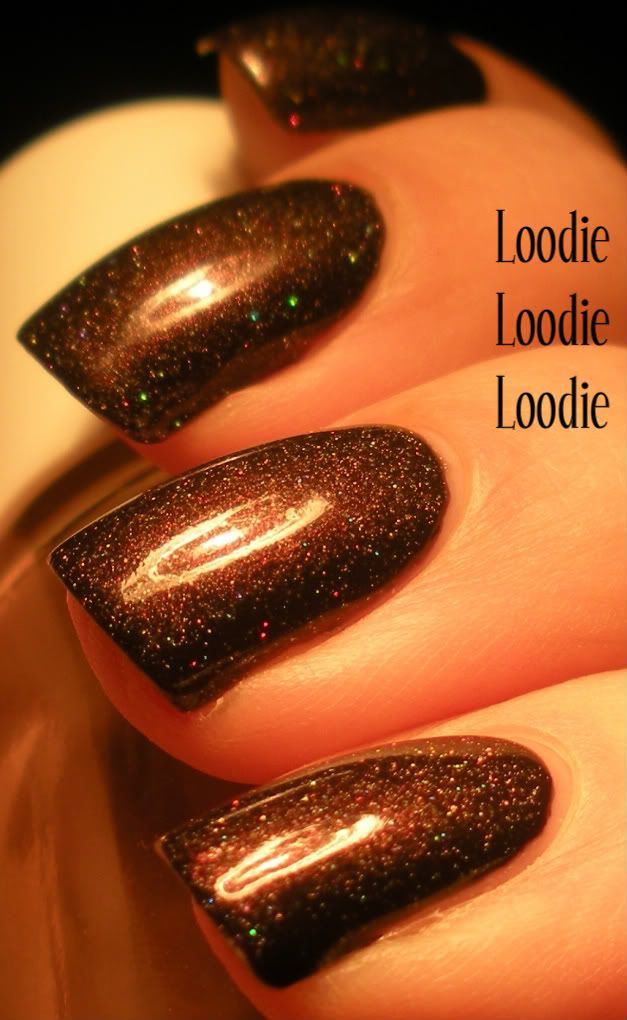
Flash shot!

Natural indirect light. Still hot though!

One day I woke up to sheet marks! Ugh, it was horrible!! I had to go to work all day like this. I'm sure I am the only one that noticed.
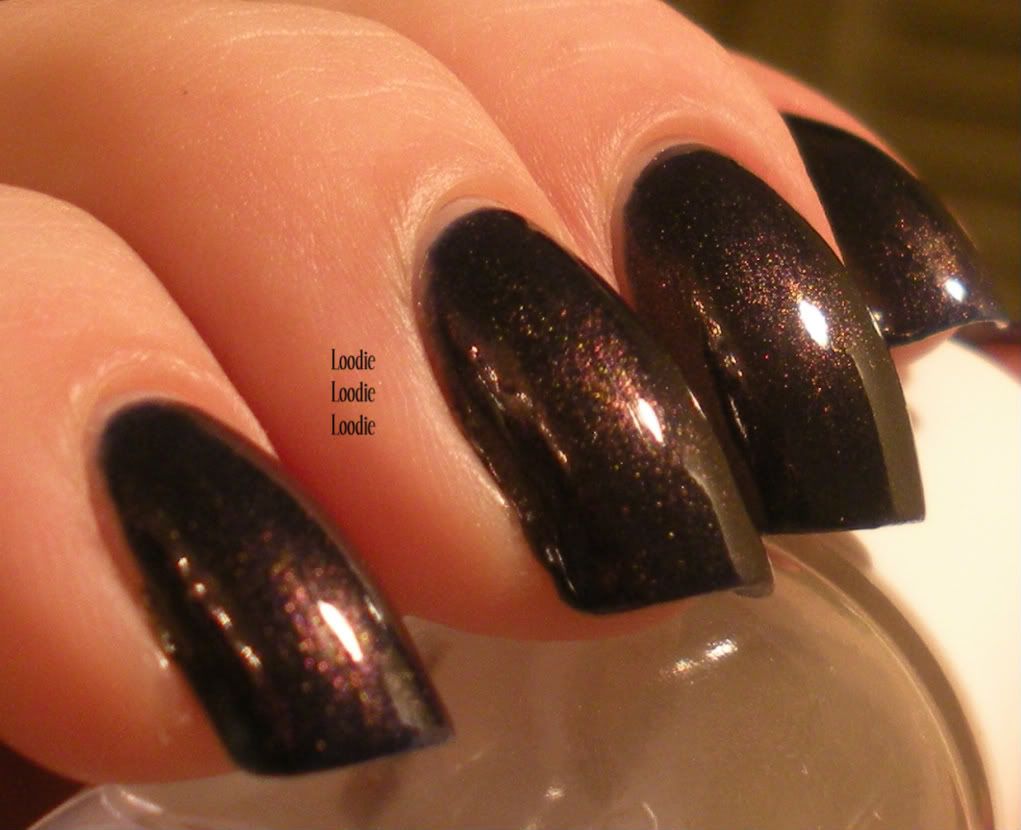
Sunlight picture!
It's definitely darker than in the first picture, hu?

What do you think?
Subscribe to:
Posts (Atom)